TM-9-2320-280-34 - Page 35 of 1258
TM 9-2320-280-34
Table 2-1.
Mechanical Troubleshooting (Cont'd)
MALFUNCTION
TEST OR INSPECTION
24.
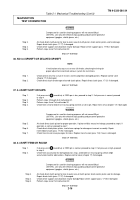
NO DETENT DOWNSHIFTS
Step 1.
Check for damaged detent solenoid. Using multimeter, test solenoid coil resistance. Resistance
should be 60-70 Ohms. Replace solenoid (chapter 17) if damaged.
Step 2.
Check detent valve train for stuck valves and incorrect assembly. Replace control valve
(chapter 17) if necessary.
END OF TESTING!
25.
NO DRIVE OR SUPS IN DRIVE
Step 1.
If oil pressure in 'D" (drive) at 1000 rpm is low, proceed to step 2. If oil pressure is normal,
proceed to step 4.
Step 2.
Perform steps 7 through 10 of malfunction 16.
Step 3.
Perform steps 4, 5, and 9 of malfunction 17.
Step 4.
Check forward clutch for damage and burned clutch plates. Repair forward clutch (para. 17-7) if
damaged.
Step 5.
Check roller clutch for damage and proper installation. Replace roller clutch (para. 17-8) if
damaged.
END OF TESTING!
26.
NO REVERSE OR SUPS IN REVERSE
Step 1.
If oil pressure in 'D" (drive) at 1000 rpm is low, proceed to step 2. If oil pressure is normal,
proceed to step 4.
Step 2.
Perform steps 7 through 10 of malfunction 16.
Step 3.
Perform step 4 and steps 6 through 9 of malfunction 17.
Step 4.
Check control valve spacer plate for obstructions and misalined gasket. Clean or replace
spacer plate (chapter 17) if damaged.
Step 5.
Check control valve for damaged or leaky passages and stuck valves or incorrect assembly.
Replace control valve (chapter 17) if damaged.
Step 6.
Check rear servo and accumulator piston for damaged oil seal rings, pistons, and band apply
pin. Check for correct length of ban apply pin. Repair rear servo and accumulator (para. 17-11)
if damaged.
Step 7.
Check center support and oil seal rings for damage and wear. Repair center support (para. 17-
9) if damaged or worn.
Step 8.
Check direct clutch for damage and burned clutch plates. Repair direct clutch (para. 17-8) if
damaged.
Step 9.
Check rear band for damage and proper installation. Replace band (chapter 17) if damaged.
Step 10. Check forward clutch for damage and binding (will not release). Repair forward clutch (para.
17-7) if damaged.
END OF TESTING!
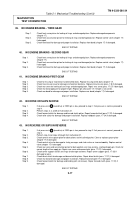
27.
VEHICLE MOVES IN NEUTRAL
Step 1.
Check manual valve for damage and proper installation. Replace manual valve (chapter 17) if
damaged.
Step 2.
Check detent lever and pin for damage and proper installation. Replace lever of pin (chapter
17) if damaged.
Step 3.
Check oil pump for leaking oil passages and damage. Repair oil pump (para. 17-6) if damaged.
Step 4.
Check forward clutch for damage and burned clutch plates. Repair forward clutch (para. 17-7) if
damaged.
END OF TESTING!
2-11
Back to Top

