TM-9-2320-328-13-P-2 - Page 559 of 1390
TM 9-2320-328-13&P-2
0181-5
DRAFT
0181
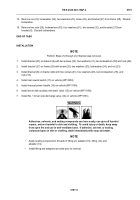
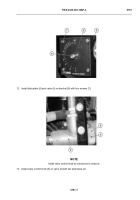
14. Remove nut (23), lockwasher (24), two washers (25), screw (26), and bracket (27) from frame (28).
Discard
lockwasher.
15. Remove two nuts (29), lockwashers (30), four washers (31), two screws (32), and bracket (27) from
bracket (9).
Discard lockwashers.
END OF TASK
INSTALLATION
NOTE
Perform Steps (1) through (3) if bracket was removed.
1.
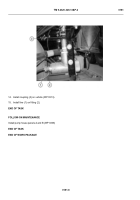
Install bracket (27) on bracket (9) with two screws (32), four washers (31), two lockwashers (30) and nuts (29).
2.
Install bracket (27) on frame (28) with screw (26), two washers (25), lockwasher (24), and nut (23).
3.
Install bracket (9) on bracket (22) with two screws (21), four washers (20), two lockwashers (19), and
nuts (18).
4.
Install reel rewind switch (17) on vehicle (WP 0253).
5.
Install manual primer handle (16) on vehicle (WP 0164).
6.
Install driver side auxiliary inlet drain valve (15) on vehicle (WP 0160).
7.
Install No. 1 driver side discharge valve (14) on vehicle (WP 0161).
-
-
-
-
-
-
-
-
-
-
-
-
-
-
-
-
-
-
-
-
-
-
-
-
-
-
-
-
-
-
-
-
-
-
-
-
-
Adhesives, solvents, and sealing compounds can burn easily, can give off harmful
vapors, and are harmful to skin and clothing.
To avoid injury or death, keep away
from open fire and use in well-ventilated area.
If adhesive, solvent, or sealing
compound gets on skin or clothing, wash immediately with soap and water.
NOTE
•
Apply sealing compound to threads of fitting (2), adapter (10), fitting (12), and
adapter (13).
•
Install fitting and adapters as noted prior to removal.
-
-
-
-
-
-
-
-
-
-
-
-
-
-
-
-
-
-
-
-
-
-
-
-
-
-
-
-
-
-
-
-
-
-
-
-
-
-
-
-
-
- -
-
-
-
-
-
-
-
-
-
-
WARNING
ICON 30, 44, 27
Back to Top

