TM-9-2320-328-13-P-2 - Page 794 of 1390
TM 9-2320-328-13&P-2
0229-2
DRAFT
0229
Change 1
-
-
-
-
-
-
-
-
-
-
-
-
-
-
-
-
-
-
-
-
-
-
-
-
-
-
-
-
-
-
-
-
-
-
-
-
-
-
2.
Remove two locknuts (3), screws (4), marker/clearance LED (5), and marker/clearance LED cover (6) from
light bezel (7).
Discard locknuts.
NOTE
•
Lamp will only function if correctly installed on rubber mounting of pigtail.
It is possible to
force lamp on rubber mounting of pigtail in opposite position, which will not allow lamp to
operate.
•
Note position of lamp on rubber mounting of pigtail prior to removal to ensure proper
installation.
3.
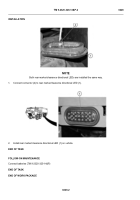
Remove marker/clearance LED pigtail connector (8) from marker/clearance LED (5).
4.
Remove marker/clearance LED (5) from marker/clearance LED cover (6).
END OF TASK
INSTALLATION
NOTE
All four marker/clearance LEDs are installed the same way.
Rear passenger side shown.
1.
Install marker/clearance LED cover (6) on marker/clearance LED (5).
NOTE
•
Lamp will only function if correctly installed on rubber mounting of pigtail.
It is possible to
force lamp on rubber mounting of pigtail in opposite position, which will not allow lamp to
operate.
•
Install lamp pigtail as noted prior to removal.
2.
Install LED pigtail connector (8) on marker/clearance LED (5).
3.
Install marker/clearance LED cover (6) and marker/clearance LED (5) on light bezel (7) with two screws (4),
and locknuts (3).
HWT1298
Back to Top


