TM-9-2320-361-34 - Page 115 of 764
TM 9-2320-361-34
3-18. ENGINE REPLACEMENT
(Contd)
NOTE
●
Do not remove spring-loaded pin from clevis. Bearing will fall free
from clevis if pin is removed.
✎
Step 32 applies to vehicles equipped with transmission power
takeoff.
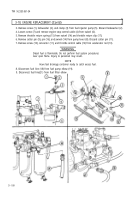
32. Pull pin (10) to one side of clevis (11) and remove clevis (11) from power takeoff arm (8).
33. Install chain to lifting eye (5) with two washers (3), screw (2), and nut (4).
34. Connect lifting device to sling.
35. Connect sling to lifting eye (1) and chain.
36. Remove two locknuts (15), washers (14), lower mounting pads (13), screws (6), and washers (7) from
frame (12). Discard locknuts (15).
37. Remove two locknuts (16), washers (17), lower mounting pads (18), screws (23), and washers (22)
from support plate (21) and crossmember (19). Discard locknuts (16).
WARNING
●
Lifting
device must have a weight capacity greater than the
weight of the engine and transmission to prevent damage to
equipment and injury to personnel.
●
All
personnel must stand clear during lifting operations. A
swinging or shifting load may cause injury to personnel.
●
Use
prybar to free engine during lifting operations. Failure to do
so may cause injury to personnel.
●
Do
not detach chain from engine until engine is supported on
engine stand. An improperly supported engine may cause injury
to personnel.
CAUTION
Closely observe all engine and transmission attachments during
removal to prevent damage to equipment.
NOTE
●
Assistant
will help with step 38.
●
Engine angle must be adjusted constantly during engine removal.
38.
Raise
engine (24) from engine compartment.
39. Lower engine (24) and position on supports.
40. Remove lifting device and sling from chain and lifling eye (1).
41. Remove nut (4), screw (2), two washers (3), and chain from lifting eye
(5).
42. Remove two mounting pads (9) and (20) from frame
(12)
and crossmember (19).
3-64
Back to Top


