TM-9-2320-434-10 - Page 518 of 1324
LOADING - Continued
9.
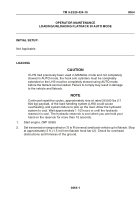
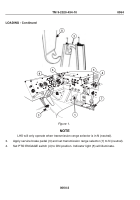
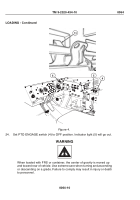
Set transmission range selector (1) to R (reverse) and back vehicle up to flatrack.
Align vehicle and flatrack as straight as possible with LHS lift hook (8) to middle of
flatrack hook bar (2) until LHS lift hook (8) contacts flatrack hook bar (2). Be sure LHS
lift hook (8) tip is positioned below bottom of flatrack hook bar (2).
NOTE
LHS will only operate when transmission range selector is in N (neutral).
10.
Set transmission range selector (1) to N (neutral).
CAUTION
Do not use R (reverse) to back up vehicle while hook arm is attached to
flatrack, or damage to equipment may occur.
11.
Move joystick (7) to LOAD position to raise LHS lift hook (8) and engage flatrack hook
bar (2).
12.
If LHS lift hook (8) fails to engage the flatrack hook bar (2):
a.
Release joystick (7).
b.
Set transmission range selector (1) to D (drive), release service brake pedal (3)
and move vehicle forward to clear flatrack. Set transmission range selector (1)
to N (neutral).
c.
Move joystick (7) to UNLOAD position until LHS lift hook (8) is below level of
flatrack hook bar (2).
d.
Repeat Steps (7) through (11).
NOTE
LHS will only operate when transmission range selector is in N (neutral).
13.
When correctly engaged, set the transmission range selector (1) to N (neutral) and
release service brake pedal (3).
NOTE
•
If NOT loading a forward repair system, skip to Step (15).
•
No additional equipment can be stowed on or in FRS during loading.
Additional equipment could OVER LOAD LHS due to weight of FRS.
14.
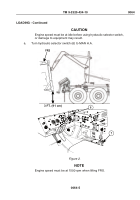
If loading a forward repair system (FRS) complete the following steps:
TM 9-2320-434-10
0064
0064-4
Back to Top

