TM-9-2330-247-14-P - Page 64 of 320
TM 9-2330-247-14&P
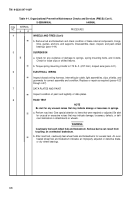
Table 4-2. Organizational Troubleshooting (Con’t).
MALFUNCTION
TEST OR INSPECTION
CORRECTIVE ACTION
Step 3.
Check air lines and fittings for breaks, damage, or leaking air pressure. Use visual checks and
soap solution.
If fittings are loose, tighten.
If air lines and fittings are damaged or leaking, replace (para 4-41).
Step 4.
Remove hub and brakedrum (para 4-44). Check brake mechanism for damaged or broken parts.
If parts are broken or damaged, replace (para 4-32).
5.
BRAKES WILL NOT APPLY OR APPLY SLOWLY.
Step 1.
Step 2.
Step 3.
Step 4.
Step 5.
Step 6.
Step 7.
Step 8.
Check towing vehicle brake system to ensure that it is operating correctly.
If brake system is not operating correctly, troubleshoot towing vehicle.
Check for damaged or leaking pressure tank or draincock. Using soap solution, coat seams.
If pressure tank or draincock is damaged or leaking, replace (para 4-42 or 4-43).
Check air lines and fittings for breaks, damage, or leaking air pressure. Use visual checks and
soap solution.
If fittings are loose, tighten.
If air lines and fittings are damaged or leaking, replace (para 4-41).
Check for damaged or clogged air filters.
Service air filters (para 4-39).
If air filters are damaged, replace or repair (para 4-39).
Have assistant apply then release towing vehicle brakes. Relay valve should vent air through
exhaust port when towing vehicle brakes are released.
If air is not vented from relay valve exhaust part when towing vehicle brakes are released,
replace relay valve (para 4-43).
Check airbrake chamber for damage.
If airbrake chamber is damaged, remove and repair (para 4-38).
Have assistant apply towing vehicle brakes. Check for leaks at airbrake chamber by listening for
air hissing.
If airbrake chamber leaks, remove and repair (para 4-38).
Check fluid level in master cylinder. Fluid level should be within ½ in. (13 mm) from filler opening.
If fluid level is low, add brake fluid (Chapter 3, Section l).
4-10
Back to Top


