TM-9-2350-256-10 - Page 294 of 796
ACETYLENE/OXYGEN HOSES INSTALLATION - Continued
4.
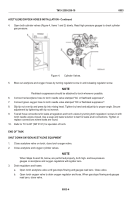
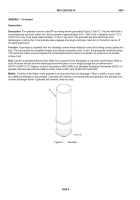
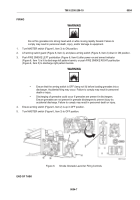
Open both cylinder valves (Figure 4, Items 1 and 2) slowly. Read high pressure gauges to check cylinder
gas pressure.
Figure 4.
Cylinder Valves.
5.
Blow out acetylene and oxygen hoses by turning regulator screw in and releasing regulator screw.
NOTE
Flashback suppressors should be attached to torch whenever possible.
6.
Connect red acetylene hose to torch needle valve stamped "AC or flashback suppressor".
7.
Connect green oxygen hose to torch needle valve stamped "OX or flashback suppressor".
8.
Slip tip nut over tip and press tip into mixing head. Tighten by hand and adjust tip to proper angle. Secure
adjustment by tightening with tip nut wrench.
9.
Test all hose connections for leaks at regulators and torch valves by turning both regulators’ screws in with
torch needle valves closed. Use a soap and water solution to test for leaks at all connections. Tighten or
replace connections where leaks are found.
10.
Refer to TC 9-237 (WP 0131) for operation of torch.
END OF TASK
SHUT DOWN OXYGEN/ACETYLENE EQUIPMENT
1.
Close acetylene valve on torch; close torch oxygen valve.
2.
Close acetylene and oxygen cylinder valves.
NOTE
When Steps 3a and 3b, below, are performed properly, both high- and low-pressure
gauges on acetylene and oxygen regulators will register zero.
3.
Drain regulators and hoses:
a.
Open torch acetylene valve until gas stops flowing and gauges read zero. Close valve.
b.
Open torch oxygen valve to drain oxygen regulator and hose. When gas stops flowing and gauges
read zero, close valve.
TM 9-2350-256-10
0053
0053-4
Back to Top

