TM-9-2350-260-20-1-2 - Page 466 of 772
TM 9-2350-260-20-1-2
FUEL SHUTOFF VALVE, LEVER, LINK, AND BRACKET REPLACEMENT (Sheet 6 of 9)
3.
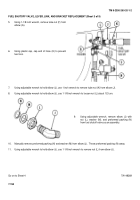
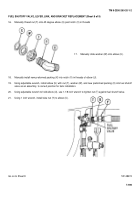
Manually thread nut (B) onto 90 degree elbow (C) past notch (D) in threads.
4.
Manually slide washer (E) onto elbow (C).
5.
Manually install new preformed packing (F) into
notch (D) in threads of elbow (Q).
6.
Using adjustable wrench, install elbow (C) with nut (B), washer (E), and new preformed packing (F) into fuel shutoff
valve as an assembly, to correct position for tank installation.
7.
Using adjustable wrench to hold elbow (C), use 1-1/8 inch wrench to tighten nut (B) against fuel shutoff valve.
8.
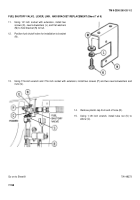
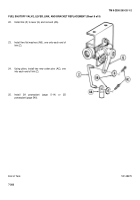
Alining holes in lever (G) with holes in shaft (H), install lever (G) onto fuel shutoff valve.
9.
Using hammer, install new spring pin (J) through lever (G) and shaft (H).
10.
Remove fuel shutoff valve from vise.
Go on to Sheet 7
TA148272
7-197
Back to Top

