TM-9-2350-311-20-2 - Page 612 of 828
TM 9–2350–311–20–2
15–8
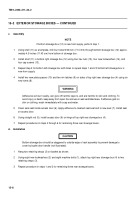
15–2 EXTERIOR STOWAGE BOXES — CONTINUED
c.
Assembly
NOTE
If bottom stowage box (12) is new from supply, perform step 1.
1
Using shelf (11) as a template, drill four holes 9/32 inch (7.14 mm) through bottom stowage box (12) approx-
imately 4.5 inches (11.43 cm) from bottom of stowage box.
2
Install shelf (11) in bottom right stowage box (12) using four hex nuts (15), four new lockwashers (14), and
four cap screws (13).
3
Repeat step 2 for bottom left stowage box with holes or repeat steps 1 and 2 if bottom left stowage box is
new from supply.
4
Install two new plate spacers (10) and two rim latches (9) on sides of top right rear stowage box (4) using six
new rivets (8).
WARNING
Adhesives can burn easily, can give off harmful vapors, and are harmful to skin and clothing. To
avoid injury or death, keep away from open fire and use in well-ventilated area. If adhesive gets on
skin or clothing, wash immediately with soap and water.
5
Clean seal seat inside access door (6). Apply adhesive to cleaned seal seat and to new seal (7). Install seal
on access door.
6
Using straight rod (5), install access door (6) on hinge of top right rear stowage box (4).
7
Repeat procedures in steps 4 through 6 for remaining three rear stowage boxes.
d.
Installation
CAUTION
Bottom stowage box should be staggered to outside edge of rack assembly to prevent damage to
cover by bustle door handle (not illustrated).
1
Hang two retaining straps (3) on basket as shown.
2
Using eight new lockwashers (2) and eight machine bolts (1), attach top right rear stowage box (4) to two
retaining straps (3).
3
Repeat procedure in steps 1 and 2 for remaining three rear stowage boxes.
Back to Top


