TM-9-2350-311-34-1 - Page 92 of 352
WARNING
TM 9-2350-311-34-1
5-2 FUEL TANKS
This task covers:
a. Removal
b. Repair
co Installation
Plastic repair kit (for repairs under 1 in. [25.4 mm])
General mechanic’s tool kit (item 14, Appx C)
(item 18, Appx B)
Adapter (item 1, Appx C)
Primer coating (CARC)
Fuel hose extension (item 8, Appx C)
Lifting sling (item 22, Appx C)
Personnel Required
.
Suitable container(s)
Two
Torque wrench (item 28, Appx C)
TM 9-2350-311-10
Coating, white (CARC) (item 6, Appx B)
TM 9-2350-311 -20-1
Dry-cleaning solvent (item 7, Appx B)
(item 14 or 15, Appx B)
Naphtha (item 11, Appx B)
Plastic repair kit (for repairs over 1 in. [25.4 mm])
Powerplant
removed (TM 9-2350-311-20-1)
(item 17, Appx B)
a. Removal
• Do not smoke or use open flame when working on fuel systems. An explosion may
occur, causing severe injury or death.
●
Fuel is hazardous waste and must be disposed of in accordance with local
procedures or direction of the local Hazardous Waste Management office.
NOTE
Draining fuel tanks manually allows draining in less than 30 minutes. Vehicle must be
driven over maintenance pit providing required clearance to fit 55-gal (208-L)
containers under vehicle. Draining fuel tanks using electric fuel pumps requires 1.5 to
2 hours.
1 Drain fuel tank manually (TM 9-2350-311-10) or use the following electric fuel pump method:
(a) Connect battery ground cables after powerplant is removed (TM 9-2350-311-20-1).
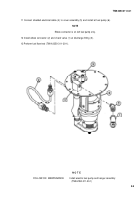
(b) Attach adapter (1) and fuel hose extension (2) to main fuel line (3) at quick disconnect (4).
(c) Move MASTER switch to on to activate fuel pumps (5) and drain fuel into suitable container.
(d) Move MASTER switch to OFF when fuel pumps (5) stop pumping fuel.
5-10
Back to Top


