TM-9-2540-207-14-P - Page 135 of 288
TM 9-2540-207-14&P
5-91
5.9.6.2 Burner Fan Plate Assembly Repair (Design Iteration 2 & 3 Only)
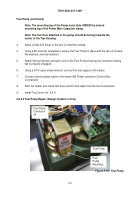
Figure 5-24.
Burner Fan Plate Assembly
5.9.6.2.1 Removal
Note:
For some installations, this procedure can be done without removing
the heater from the vehicle, but require
power and fuel to be disconnected
from the heater.
1.
Remove Top Cover (ref. 5.4.1).
2.
Remove Wiring Harness connectors from the Fuel Pressure Sensor (J4) (ref. 5.9.1) and
the Diagnostic Display (J2) (ref. 5.9.2).
3.
Remove Wiring Harness connectors from the Fuel Injector (J5), (ref. 5.9.5) and the
Burner Fan Driver Board (J3) (ref. 5.9.6).
Note:
All the connectors in the Top Housing are different in size and
shape. All connectors have locking tabs, which can be released by finger
pressure.
4.
Remove the two (2) fuel lines from the Burner Fan Plate fuel fittings.
5.
Remove Fuel Pump (ref. 5.9.3).
6.
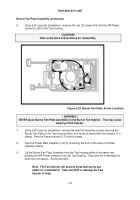
Using a #1 cross-tip screwdriver, unscrew the two (2) screws that hold the MS Power
connector (J2) to the Top Housing.
Screw
Star
Washer
Fuel Pump
#8 Screws
#6 Screws
Burner Fan Plate
Fuel Injector
MS Power
Connector
Back to Top


