TM-9-2815-200-35
ENGINE, WITH CONTAINER:TURBOSUPERCHARGED, DIESEL ,FUEL INJECTION ,90-DEGREE “V” TYPE, AIR - COOLED ,12 - CYLINDER , ASSEMBLY ;MODELS AVDS-1790-2M (2815-856-4996), AVDS-1790-2A AND AVDS-1790-2AM (2815-856-9005)
TECHNICAL MANUAL; DIRECT SUPPORT, GENERAL SUPPORT AND DEPOT MAINTENANCE MANUAL INCLUDING REPAIR PARTS AND SPECIAL TOOLS LISTS
TM-9-2815-200-35 - Page 550 of 779
(a)
First production inspection.
The first
ten engines when completed, and after successful
performance of the overhaul engine tes t
schedule, shall have all cylinders, of each engine,
inspected by borescope. If no evidence o f
scuffing is detected,
the sampling inspection
method may be applied.
(b)
Sampling inspection.
Under thi s
method, after successful performance of the
overhaul engine test schedule, sample engines
shall be selected for borescope inspection at the
rate of one in every 25 engines or one per month
when monthly production is less than 25. If
scuffing of cylinder walls is detected, the five
engines produced preceding the sample engine
and the five engines produced after the sample
engine will have all cylinders borescoped. Should
there be evidence of scuffing as a result of this
inspection, the inspector shall refuse acceptance
of these engines and subsequent production
engines, until required corrections have been
made and evidence to this effect has been
presented to inspector.
(2) Refer to figures 4-126 through 4-141 to
remove upper cover shroud plates. Remove as
many fuel injection pump fuel tube support
clamps as are accessible with the cover plates
removed. Disconnect fuel injector fuel return
hoses or tubes and fuel injection pump fuel tubes
from injector nozzles (fig. 4-150) using extreme
caution not to bend or kink the fuel tubes.
(3) Loosen the fuel injector nozzles using
open end fixed wrench - 5120-871-7198 (fig. 4-
152). Remove fuel injector nozzle and holder
assemblies from the 12 cylinder heads (fig. 4-
153). To facilitate removal of No. 6L nozzle and
holder assembly, remove the connector from the
nozzle head.
This will allow the necessary
clearance with the shrouding to remove the
nozzle and holder.
(4) The relative position of the piston for
borescoping the cylinders is in the down position
or at the lowest most point of the downward
stroke. This enables the inspection of the longest
portion of cylinder bore affected by piston travel.
To achieve this, the flywheel must be rotated
using
splined
wrench
-
(fig.
4-
51) allowing two pistons on each bank o f
cylinders to be in the down position and enabling
the complete inspection of an engine with only
three turns of the flywheel. The combinations of
cylinders that can be inspected at one time are as
follows: (a) Nos. 2 and 5 right bank, - 3 and 4
left bank, (b) Nos. 3 and 4 right bank, - 1 and 6
left bank, (c) Nos. 1 and 6 right bank and 2 and
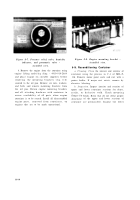
5 left bank. To determine when the pistons to be
checked are at the lowest point of the downward
stroke, use a brass rod as a gage and insert it
through the fuel injector nozzle opening in the
cylinder head (fig. 8-5). When piston stroke is in
the maximum down position, mark the gage rod
at the point where the rod protrudes from the
cylinder head nozzle opening. This will facilitate
the proper positioning of the following cylinders
to be checked.
Note.
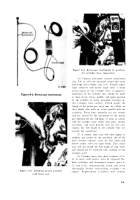
Do not use borescope as a probe or gage
in determining position of the piston in the
cylinders. The instrument can easily be damaged
when engine flywheel is rotated to position
pistons for borescoping.
(5) During inspection of the cylinders, it is
recommended that a record be made of each
cylinder checked and the positio n
of an y
discrepancies noted. Relative position of a
cylinder defect can be determined as though
reading a clock with the top of the cylinder in the
12:00 position. A wear pattern beginning at the
top of the cylinder and extending on a 30 degree
angle clockwise, would be recorded as a wear
pattern extending from the 12:00 to 1:0 0
position.
8- 8
Back to Top


