TM-1-1500-344-23-2 - Page 62 of 240
3-2
NAVAIR 01-1A-509-2
TM 1-1500-344-23-2
15 April 2009
3-2. INSPECTION METHODS.
3-2.1. VISUAL INSPECTION. Visual inspection is the
most widely used method for the detection and evaluation
of corrosion. It is very effective for detecting surface,
exfoliation, pitting, and intergranular corrosion if done
carefully and with knowledge of where and what to look
for. Read Volume I, Chapter 3 (Corrosion Theory) before
performing a corrosion inspection, paying particular
attention to Table 3-1 of Volume I (Corrosion of Metals -
Type of Attack and Appearance of Corrosion Products).
3-2.1.1. The following tools can be used to find and
evaluate the extent of corrosion damage:
a. Flashlight.
b. 10X Magnifying Glass.
c. Plastic Scraper.
d. Borescope.
e. Depth Gage, Pin Micrometer Type.
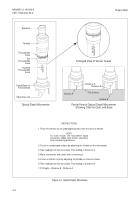
f. Optical Depth Micrometer.
3-2.1.2. Evidence of Corrosion. Aluminum corrosion
products will be white, gray, or black and may appear as
a paste when wet, or a hard, adherent film or easily
crumbled deposits (i.e., powder) when dry. Magnesium
corrosion products are white and form in large amounts
with significant losses to the base metal. Steel corrosion
products are red, brown, or black rust deposits which
are easily detected. Copper corrosion products are blue
or blue-green and are also easily detected. Titanium
and stainless steels do not produce significant amounts
of corrosion products but can exhibit stress corrosion
cracking. When corrosion occurs beneath a paint system,
the surface of the paint often appears blistered or
distorted.
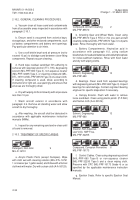
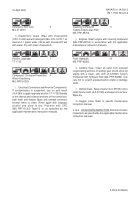
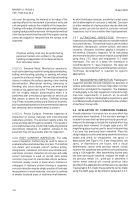
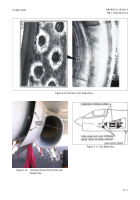
3-2.2. VISUAL INSPECTION WITH BORESCOPE. A
borescope is an instrument with a small, high intensity
light that can be used in the inspection of interior
surfaces (e.g. tubing, ducts, and pipes) which are not
accessible by any other method (see Figure 3-1).
Examples of the different kinds of borescopes include
flexible, rigid, micro, video, and fiberscopes. Insert the
head assembly into any cavity having a large enough
opening. With the cavity illuminated, visually inspect its
interior for defects, such as damage to the paint system
and corrosion.
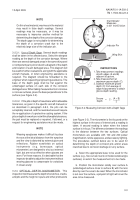
3-2.3. DEPTH GAGE. Depth gages are tools for
measuring the depth of corrosion pits and reworked
areas to determine the extent of corrosion present and
the amount of metal removed during rework.
Table 3-1. Inspection Equipment and Techniques
n
o
i
s
o
r
r
o
C
f
o
e
p
y
T
1n
o
i
s
o
r
r
o
c
e
c
a
f
r
u
s
m
r
o
f
i
n
U
2n
o
i
s
o
r
r
o
c
l
a
t
e
m
r
a
l
i
m
i
s
s
i
d
r
o
c
i
n
a
v
l
a
G
3)
l
a
r
e
n
e
g
(
k
c
a
t
t
a
r
a
l
u
n
a
r
g
r
e
t
n
I
4)
n
o
i
t
a
i
l
o
f
x
e
(
k
c
a
t
t
a
r
a
l
u
n
a
r
g
r
e
t
n
I
5g
n
i
t
t
i
P
6n
o
i
s
o
r
r
o
c
g
n
i
t
t
e
r
F
7g
n
i
k
c
a
r
c
n
o
i
s
o
r
r
o
c
s
s
e
r
t
S
8e
u
g
i
t
a
f
n
o
i
s
o
r
r
o
C
9n
o
i
s
o
r
r
o
c
m
r
o
f
i
l
i
F
0
1n
o
i
s
o
r
r
o
c
t
o
H
t
n
e
m
p
i
u
q
E
r
o
d
e
t
c
e
t
e
D
e
p
y
T
n
o
i
s
o
r
r
o
C
d
e
t
a
u
l
a
v
E
)
w
o
l
e
B
e
p
y
T
e
e
S
(
e
p
o
c
s
e
r
o
B0
1
,
5
,
4
,
3
,
2
,
1
e
g
a
G
h
t
p
e
D5
,
4
,
1
r
e
t
e
m
o
r
c
i
M
h
t
p
e
D
l
a
c
i
t
p
O9
,
7
,
6
,
5
,
4
,
2
,
1
t
n
a
r
t
e
n
e
P
t
n
e
c
s
e
r
o
u
l
F8
,
7
,
5
,
4
,
3
t
n
e
r
r
u
C
y
d
d
E8
,
7
,
5
,
4
,
3
,
1
c
i
n
o
s
a
r
t
l
U8
,
7
,
4
,
3
,
1
t
c
e
t
e
d
n
a
c
(
y
h
p
a
r
g
o
i
d
a
R
e
r
o
m
r
o
%
2
f
o
s
s
o
l
s
s
e
n
k
c
i
h
t
5
,
1
Figure 3-1. Fiber Optic Borescope
Back to Top

