TM-5-5420-228-24 - Page 504 of 750
TM 5-5420-228-24
HEU OR EARLY MODEL OVERHEAD CYLINDER REPLACEMENT (Sheet 1 of 7)
PROCEDURE INDEX
P
r
o
c
e
d
u
r
e
s
P
a
g
e
Removal
3-225
Installation
3-228
TOOLS:
12-in. Adjustable wrench
Ratchet with 3/8 inch drive
1 1/4-in. Open end wrench
5-inch extension with 3/8 inch drive
7/16 in. socket with 3/8 in. drive
1 5/16-in. socket with 3/4 in. drive
Snap ring pliers (outside)
Ratchet with 3/4 in. drive
Hammer
Crow bar
Lifting device (2000 lb capacity)
Sling
Punch, drive pin, 3/4 in. x 10 in.
Cylinder rod wrench, 4-9/16 in.
1-1/8 in. open end wrench
SUPPLIES:
Pencil (Item 22, Appendix D)
Protective caps and plugs (assorted sizes)
Drip pans (suitable containers)
Pipe tape (Item 19, Appendix D)
Masking tape (Item 18, Appendix D)
Rags (Item 12, Appendix D)
Lockwashers (10 required)
PERSONNEL: Three
REFERENCE: LO-12
TM-10
PRELIMINARY PROCEDURES: Extend tongue (TM-10)
Remove overhead cylinder armor (page 3-223)
Relieve hydraulic pressure (page 3-71)
For HEU models, remove overhead counterbalance valve, hoses, and fittings
(page 3-204.5)
NOTE
•
Use rags and drip pans to catch excess hydraulic fluid. Use masking tape to tag
lines for installation. Cap or plug all lines and fittings as they are disconnected.
•
For HEU models, go to step 7.
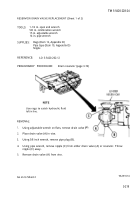
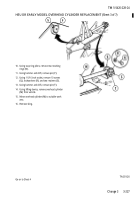
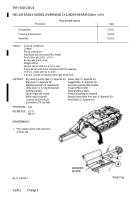
REMOVAL:
1.
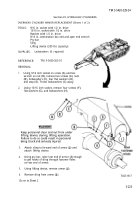
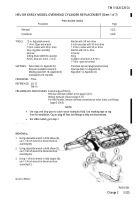
Using adjustable wrench to hold elbow (A),
use 1-1/4 inch wrench to disconnect hose
assembly (B).
2.
Using adjustable wrench to hold elbow (C),
use 1-1/4 inch wrench to disconnect hose
assembly (D).
3.
Using 1-1/8 inch wrench to hold adapter (E),
use 1-1/4 inch wrench to disconnect hose
assembly (F).
Go on to Sheet 2
Change 3
3-225
Back to Top

