TM-9-1240-401-34-P - Page 94 of 590
TM 9-1240-401-34&P
3-22. EYEPIECE AND ERECTOR LENS SUBASSEMBLY MAINTENANCE INSTRUCTIONS
- continued
c. Assembly
1
2
3
4
5
6
7
8
9
NOTE
If fixed ratchet is to be replaced, perform steps
1 thru 5. If existing parts are reinstalled, pro-
ceed to step 6.
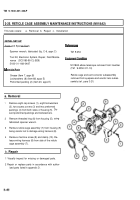
Apply grease (item 7, appx B) to new preformed
packing (30) and install in groove of seal (18).
Install section of seal (18) with preformed packing
(30) installed, spacer (29), and fixed ratchet (26) on
rear housing (14).
Position fixed ratchet (26) with area to be drilled in
a different location from original pin holes in rear
housing (14). Secure fixed ratchet (26) with six new
Iockwashers (28) and six cap screws (27).
Drill holes for two headless straight pins (31 ), using
a No. 15 (0.180) drill; drill into rear housing (14) 3/8
inch (9.53 mm) deep. Ream for drive fit in the rear
housing (14) and fixed ratchet (26).
Drive two headless straight pins (31) into holes
drilled in step 4 above.
NOTE
Follow steps 6 thru 10 if reinstaIling existing
parts.
Apply grease (item 7, appx B) to new preformed
packing (30) and install in groove of seal (18).
Install section of seal (18) with preformed packing
(30) installed, spacer (29), and fixed ratchet (26) on
rear housing (14).
If removed, aline headless straight pins (31) with
pin holes in rear housing (14) and secure with six
new Iockwashers (28) and six cap screws (27).
Apply grease (item 7, appx B) to new preformed
packing (25) and install in groove of rear housing
(14) opposite the side where fixed ratchet (26) has
been installed.
3-36
Back to Top


