TM-9-2320-272-23-3 - Page 1103 of 1469
REMOVAL
1.
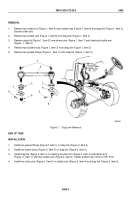
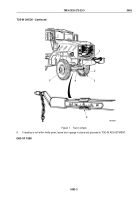
Remove two cotter pins (Figure 1, Item 5) from slotted nuts (Figure 1, Item 6) and drag link (Figure 1, Item 2).
Discard cotter pins.
2.
Remove two slotted nuts (Figure 1, Item 6) from drag link (Figure 1, Item 2).
3.
Remove drag link (Figure 1, Item 2) from pitman arm (Figure 1, Item 7) and steering knuckle arm
(Figure
1,
Item 4).
4.
Remove two rubber boots (Figure 1, Item 3) from drag link (Figure 1, Item 2).
5.
Remove two grease fittings (Figure 1, Item 1) from drag link (Figure 1, Item 2).
M5029DAA
1
2
3
3
4
5
6
6
5
7
Figure 1.
Drag Link Removal.
END OF TASK
INSTALLATION
1.
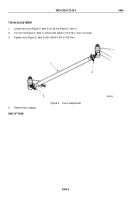
Install two grease fittings (Figure 2, Item 1) on drag link (Figure 2, Item 2).
2.
Install two rubber boots (Figure 2, Item 3) on drag link (Figure 2, Item 2).
3.
Install drag link (Figure 2, Item 2) on steering knuckle arm (Figure 2, Item 4) and pitman arm
(Figure
2,
Item
7) with two slotted nuts (Figure 2, Item 6). Tighten slotted nuts 140 lb-ft (190
N·m).
4.
Install two cotter pins (Figure 2, Item 5) in slotted nuts (Figure 2, Item 6) and drag link (Figure 2, Item 2).
TM 9-2320-272-23-3
0492
0492-2
Back to Top


