TM-9-2320-272-23-3 - Page 218 of 1469
INSTALLATION
1.
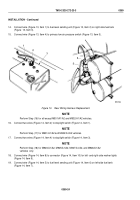
Thread wiring harness (Figure 2, Item 3) through clamp (Figure 2, Item 9).
2.
Connect wiring harness connector (Figure 2, Item 1) to connector (Figure 2, Item 6).
3.
Connect wiring harness connector (Figure 2, Item 4) to connector (Figure 2, Item 5).
4.
Install clamp around wiring harness (Figure 2, Item 3) and install clamp (Figure 2, Item 9) to rail
(Figure
2,
Item
2) with screw (Figure 2, Item 8) and locknut (Figure 2, Item 7).
5.
Take up slack and put band back around wiring harness (Figure 1, Item 3).
M7001DAA
7
9
8
6
1
2
3
4
5
Figure 2.
Side Marker Light Wiring Installation.
END OF TASK
FOLLOW-ON MAINTENANCE
1.
Connect battery ground cables. (Volume 2, WP
0350)
2.
Start vehicle and check operation of lights. (TM 2320-272-10)
END OF TASK
END OF WORK PACKAGE
TM 9-2320-272-23-3
0360
0360-3/4 blank
Back to Top


