TM-9-2320-272-23-4 - Page 179 of 1393
ASSEMBLY
1.
Position frame filler strip (Figure 3, Item 10) around glass (Figure 3, Item 9).
2.
Install glass (Figure 3, Item 9) with frame filler strip (Figure 3, Item 10) in frame (Figure 3, Item 8).
3.
Install crosspiece filler strip (Figure 3, Item 1) over glass (Figure 3, Item 9).
4.
Install crosspiece (Figure 3, Item 2) on glass (Figure 3, Item 9) and tap into position until screw holes are
aligned with holes in frame (Figure 3, Item 8).
CAUTION
Do not overtighten crosspiece or windshield frame screws. Glass could be damaged.
5.
Secure crosspiece (Figure 3, Item 2) on frame (Figure 3, Item 8) with two screws (Figure 3, Item 5), lockwashers
(Figure 3, Item 4), and capnuts (Figure 3, Item 3).
6.
Install four lockwashers (Figure 3, Item 6) and screws (Figure 3, Item 7) on frame (Figure 3, Item 8).
7.
Install locking latch (Figure 3, Item 12) on frame (Figure 3, Item 8) with two screws (Figure 3, Item 11),
lockwashers (Figure 3, Item 13), and capnuts (Figure 3, Item 14).
8.
Trim crosspiece filler strip (Figure 3, Item 1) and frame filler strip (Figure 3, Item 10) even with frame
(Figure
3, Item 8) and crosspiece (Figure 3, Item 2) edges.
3
4
5
M9994DAA
1
2
6
7
8
9
10
11
12
13
14
1
8
9
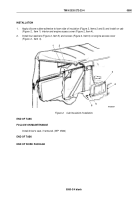
Figure 3.
Cab Windshield Assembly.
END OF TASK
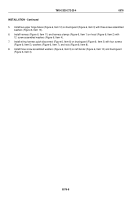
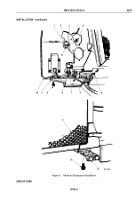
INSTALLATION
1.
Install two friction lockarms (Figure 4, Item 11) on windshield frame assembly (Figure 4, Item 6) with two spring
washers (Figure 4, Item 15) and screws (Figure 4, Item 13).
2.
Apply sealing compound to hinge seal (Figure 4, Item 3) and install on hinge (Figure 4, Item 5).
TM 9-2320-272-23-4
0578
0578-4
Back to Top

