TM-9-2320-272-23-5 - Page 311 of 623
REMOVAL - Continued
13.
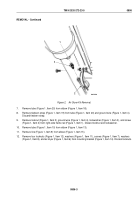
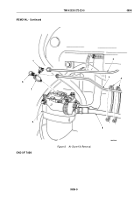
Remove three locknuts (Figure 3, Item 7), washers (Figure 3, Item 6), clamp (Figure 3, Item 4), three screws
(Figure 3, Item 3), mounting bracket (Figure 3, Item 2), and two air lines (Figure 3, Item 5) from frame
crossmember (Figure 3, Item 1). Discard locknuts.
M9840DAA
1
2
3
4
5
6
7
Figure 3.
Air Dryer Kit Removal.
14.
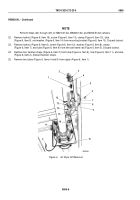
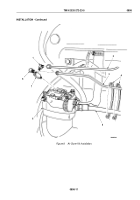
Remove elbow (Figure 4, Item 9) from bushing (Figure 4, Item 8) on air dryer (Figure 4, Item 2).
15.
Remove bushing (Figure 4, Item 8) from outlet port (Figure 4, Item 1).
16.
Remove elbow (Figure 4, Item 5) from bushing (Figure 4, Item 6).
17.
Remove bushing (Figure 4, Item 6) from inlet port (Figure 4, Item 7).
18.
Remove elbow (Figure 4, Item 3) from control port (Figure 4, Item 4).
M9074DAA
4
5
6
7
8
1
2
3
9
Figure 4.
Air Dryer Kit Removal.
TM 9-2320-272-23-5
0806
0806-4
Back to Top

