TM-9-2330-342-23-P - Page 748 of 1348
REMOVAL - Continued
3.
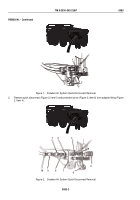
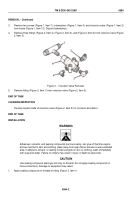
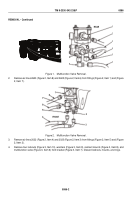
Remove two screws (Figure 1, Item 7), lockwashers (Figure 1, Item 4), and inversion valve (Figure 1, Item 2)
from frame (Figure 1, Item 12). Discard lockwashers.
4.
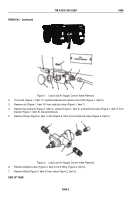
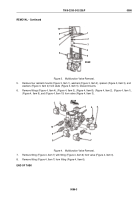
Remove three fittings (Figure 2, Item 4), (Figure 2, Item 3), and (Figure 2, Item 2) from inversion valve (Figure
2, Item 5).
1
2
3
4
5
Figure 2.
Inversion Valve Removal.
5.
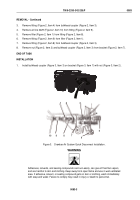
Remove fitting (Figure 2, Item 1) from inversion valve (Figure 2, Item 5).
END OF TASK
CLEANING/INSPECTION
Visually inspect inside of inversion valve (Figure 2, Item 5) for corrosion and debris.
END OF TASK
INSTALLATION
WARNING
Adhesives, solvents, and sealing compounds can burn easily, can give off harmful vapors,
and are harmful to skin and clothing. Keep away from open flame and use in well-ventilated
area. If adhesive, solvent, or sealing compound gets on skin or clothing, wash immediately
with soap and water. Failure to comply may result in injury or death to personnel.
CAUTION
Use sealing compound sparingly and only on threads. Do not apply sealing compound on
hose connections. Damage to equipment may result.
1.
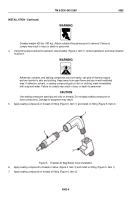
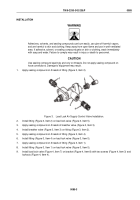
Apply sealing compound on threads of fitting (Figure 3, Item 1).
TM 9-2330-342-23&P
0084
0084-2
Back to Top

