TM-9-2330-342-23-P - Page 922 of 1348
REMOVAL - Continued
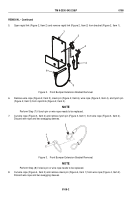
6.
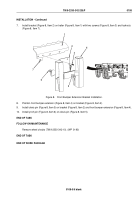
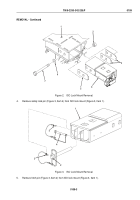
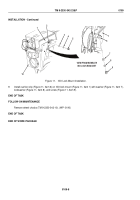
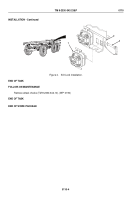
Cut wire rope (Figure 3, Item 3) and remove wire rope (Figure 3, Item 3) and hitch pin (Figure 3, Item 2) from
ISO lock mount (Figure 3, Item 1).
7.
Cut wire rope (Figure 3, Item 5) and remove wire rope (Figure 3, Item 5) and safety lock pin (Figure 3, Item 4)
from ISO lock mount (Figure 3, Item 1).
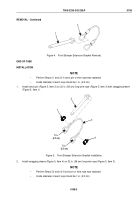
8.
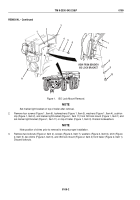
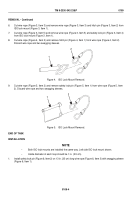
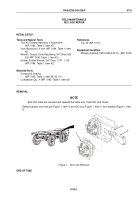
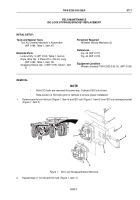
Cut wire rope (Figure 4, Item 2) and remove hitch pin (Figure 4, Item 1) from wire rope (Figure 4, Item 2).
Discard wire rope and two swagging sleeves.
1
2
Figure 4.
ISO Lock Mount Removal.
9.
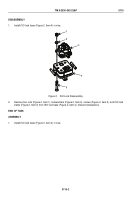
Cut wire rope (Figure 5, Item 2) and remove safety lock pin (Figure 5, Item 1) from wire rope (Figure 5, Item
2). Discard wire rope and two swagging sleeves.
1
2
Figure 5.
ISO Lock Mount Removal.
END OF TASK
INSTALLATION
NOTE
•
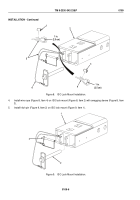
Both ISO lock mounts are installed the same way. Left side ISO lock mount shown.
•
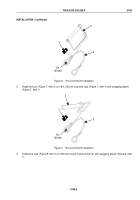
Inside diameter of each loop should be 1 in. (2.5 cm).
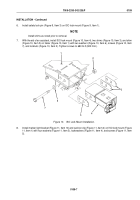
1.
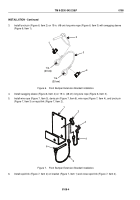
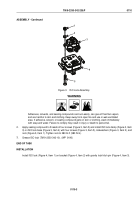
Install safety lock pin (Figure 6, Item 2) on 13 in. (33 cm) long wire rope (Figure 6, Item 3) with swagging sleeve
(Figure 6, Item 1).
TM 9-2330-342-23&P
0109
0109-4
Back to Top

