TM-9-2815-220-34 - Page 164 of 532
TM
9·2815-220±34
I
NozZle bOdy
2
SEa
i
spAcEr
3
±him
4
UpPeR ²prIng
S±l
s
³´efOµmed p¶Ck·¸G
6
NOzzLe ¹etai¸e¹
7
ºµefOµMed P¶»K¼nG
7.1
ºReFOrMeD pa½KIn¾
8
¿pÀut
9
NOzzÁe ²ÃeÄBÅy
I 0
ÆÇaÈ wÂÃheµ (GÂÃKet)
²1
ÉÊËÌe ÍODy
²³
ÉOÎzÏe vALVe
´µ
ÉÐÑÒÓe ÃpaÔeÕ
¶·
ÖÐWe× ²prIng ÃØaT
¶5
ÉÐÎÑÙe ÃP¹inG
²¸
Úet¶ÛÜe¹ ²pÝiÀg
²¹
ÞßÍe cOnnecàÐr
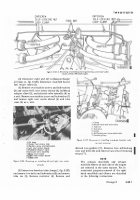
Fgure 2-13±. fEl injE²Ro³ NoUL´ aNd holDµr tµmb¶y
·
µxp¸ODED vIe¹º
d. Cleaning±
NOtE
Do not use sharp tools, wire brushes or
abrasive mateRIaLs to c±eaN the nOzzle or
noZzle b²y.
(1)
cLean FueL INje²tor ³ozzle AsSembly.
Soak
NOzz±e body IN caRbon RemovIng solveNt to remove
major caRboN ³epo´Itsµ ¶emaiNINg caRboN ³ep·sit´
shoul³ be remove³ usiNg a soft cLoth or felt pa³ aN³
muttoN ta±Low¸
A
pIece of soft w¹³º soake³ In oiL
may aLso be use³ as a carbon remover»
(2)
clean ³Ozzle ´pRaY µ¶·f¸¹eJº
¼emove carboN
fRom the oRIfices of the NozzLe b½y by soakINg NOZzLe
bo³y iN a caRboN removiNg solveNt oNly¾ ¿o not cleaN
oRifices wIth cleaNiNg wiRe as this metho³ wi±L ³istort
nozzle orIfices aN³ aLso may bÀÁk openiNg ³ue to
wire bReakageÂ
(3)
clean »Uel ¼n½e¾T¿r H¿lder and AsÀÁÂated
Pa¶TJÃ
CLean alL paÃtÄ thoRoughÅyÆ Be suRe hands aÃe
kept FRee fRom accumuLatIoN of grease whIch wilL
cause colLection of ³ust aN³ grit on part´Ç CoveR or
wRap aLÈ paÃTÄ after cLeaNIng to pRotect them from
³iRt accumulationÇ
eÄ ¼nspeÅÆ·OnÄ
(É)
IÇÈÉeÅt ³ozzle BÊY aÇd Valve.
Ênspect seat
2-8²
CHAËGE
3
of N·zzle vaLve (Ì2º figÍ 2-Î33} foR evi³eNce of weaRÏ
³istoRtioN
of
the
vaLve
seat
³ue
to
poun³Ing,
³iscoLoratioN ³ue to oveRheatiNg, aN³ pIttIÐg¸ ÊNspect
the valve stem for scratches aN³ ³iscoLoration¸ Check
fit of va±ve In NÑzz±e b²y (1ÎÒ by LIftiNg the va±ve
about oNeÓthiR³ of its leNgth out of the bodyÇ Ôhe
valve shoul³ sÕi³e back to its seat without ai³ wheN
the aÄ´embly Is hel³ at a
4
³egRee angÖe× ØNspect the
eight spRay orIfices IN the Nozzle bo³y tip an³ the
³riLle³ passage iN the bo³y foR free³om of obÙ
stRUctIonsÚ Ênspect lappe³ seaLiNg suRÛaces of vaLve
bo³y for cracks, scratchesº ³iscoloRatioNÜ weaRÜ pitÝ
ting aN³ evi³eNce of pouN³iNgÞ
(2)
ËÌÍ$peÎt ³OzZle
Spacer.
Ênspect the Lappe³
seaLIng suRfaces oN the eN³s of the Nozzle spaceR (ß3à
for scRatches, ³IscoÈoRatIoN, an³ cRacks¾ Êáspect the
area aRoun³ the ceNteR hoLe on the nÑâz±e en³ foR
evI³ence of weaR aN³ poun³Ing by the valve N·âzle
b²yÇ MaxImum allowable ³epth of wear of pouN³iNg
at thIs aRea Is 0¸ã3-iNchÇ ØNspect ³rILle³ passage´ iN
spacer for obstRäctioNså
(3)
ÏnspeÐt ³OzzLe aÑd Òeta·Çer ´p¶·ÇgÓ, ´pr·ng
ÔeaTÕ aÖD Ôh×MØÙ
Ênspect the NozzLe spRIng (Î5) foR
cracks aN³ evI³eNce of weaRÇ ænspect retaiNeR spRiNg
(16) for cRacks, aN³ foR evI³ence of ³IscoloratIon ³ue
t
excessive heatÚ çRee LeNèTh of RetaineR spriNg must
be éÂ4ê3 to ëì4ê9íiNchÇ ÊNspect uppeR an³ loWeR spRINg
seatÄ (4) aN³ (î4), shims (3à aN³ seat spaceR (2) fÑR
cRacks, scRatchesÜ aN³ evi³ence of pouN³ingÇ
(4)
ÚnÛpe¾T ³¿zzLe B¿dY
and
ÒetaineÜ.
ÊNspect
the NÑZzLe b²y (1) an³ Noâzle retaineR (6) for cRacks,
burÃs, Nicks, aN³ raIse³ metal ïNspect sealing surÙ
faces
fÑr
scratches
aN³
³IscoLorationå
ÊNspect
threa³e³ aReas an³ tappe³ openiNg´ for sðRIppe³ or
³amage³ threa³sÂ
(5)
ÝÞpe¾T ³ozzle cap1ßàT
aNd
áUâe
Co³;´EµtOr
Ênspect the NÑzzLe capNut{8) an³ tube coNnector (É7)
I
foR NicksÜ burñ, Raise³ metal suRf acesÜ an³ cracks¾ Jnò
spect thRea³e³ area Insi³e capnut foR stRippe³ oR
³amage³ thRead´Ç Ênspect the gasket aRea on en³ of
cap Nut for ³eep scratchesÂ
f
ÒeÉa·rã
i
¸¹º
¼epLace nOzzle as´embLy
»¼½
wheN ó½y seat
oR vaLve seat is ba³ly woRnÜ poun³e³º or pItte³, or
when nOâzle bѳy orifices aRe cloège³Í ¼epÈace nOzzle
assembLy wheN Lappe³ sealing surfaces aRe Nicke³,
scratche³ oR cRacke³»
(2à ¼epaiR of the remaiNing nozzle compoNeNt´ is
LImite³ to cLeaNing up threa³s on the nozzle bo³y (éàô
NÑZzLe RetaINeR (6à aN³ capNut õö)Ç Êt is Not practicaL
I
to attempt repairs to aNy of the remaiNIng paRtsÇ Êf
Inspect÷ioN reveaLe³ ³amage to aNy of the RemaiNIng
paÃtÄ, Replace the complete NozzÈe aN³ hoL³er assemÙ
bLyÇ
gã äÀseåblæ.
Back to Top


