TB-9-2510-251-13 - Page 111 of 624
2-95
TB 9-2510-251-13
2-1.3
Installation of Air Conditioning Kit to M1025 and M1025A1 with GSIE Add-on-Armor
(Cont’d).
d. Install Refrigerant Hoses (Cont’d)
CAUTION
•
Avoid high heat surfaces, sharp edges, and moving parts of vehicle.
Keep
hoses tucked up high enough to prevent being snagged as vehicle travels over
obstacles or brush.
Failure to comply may result in damage to equipment.
•
Hoses should span no more than two feet without being secured.
Failure to
comply may result in damage to equipment.
(8)
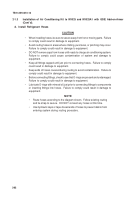
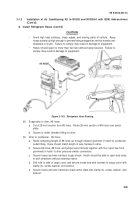
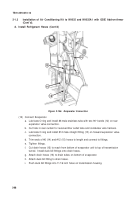
Evaporator to drier, #6 hose:
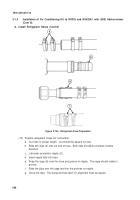
a. Cut a 28-inch section from #6 hose.
Route 28-inch section of #6 hose over armor
plate.
b. Secure to outlet (female) fitting on drier.
(9)
Drier to condenser,
#6 hose:
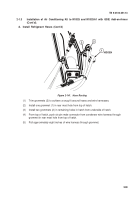
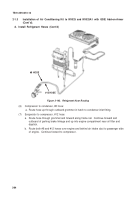
a. Route remaining length of #6 hose up through inboard grommet in hatch to condenser
outlet fitting.
Hose should match length of wire harness to drier.
b. Secure #6 hose, #8 hose, and jumper wire harness together with four nylon ties from
grommets in hatch to drier pressure switch connectors.
c.
Secure hoses and wire harness to gas shock.
Hatch should be able to open and close
in both directions without straining hoses.
d. Drill hole in side of cargo cover and secure hoses and wire harness to cargo cover with
clamp (3), screw, washer, and locknut.
e. Secure hoses and wire harness to back armor plate with clamp (3), screw, washer, and
locknut.
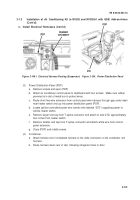
Figure 2-143.
Refrigerant Hose Routing
#6 HOSE
3
3
Back to Top

