TB-9-2510-251-24 - Page 40 of 212
TB 9-2510-251-24
1-30
4)
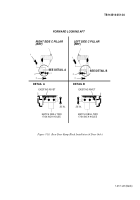
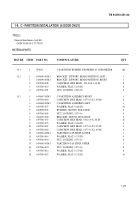
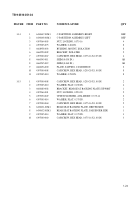
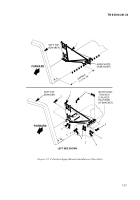
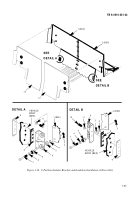
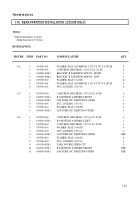
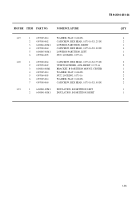
Install C-partition isolator brackets as follows (see figure 1-14, Detail A).
a.
Install two isolator mount bushings (5) into isolator bracket (6).
b.
Install washer (4) onto two capscrews (7).
c.
Install two capscrews (7) into isolator bracket (6).
d.
Install washers (4) onto capscrews (7).
e.
Install isolator bracket (6) onto right C-partition assembly (1) securing with locknut (3) and washer (4).
Torque capscrews (7) to 37 lb ft (50 N
•
m).
f.
Match drill four each 9/32-inch holes through isolator bracket (6) and vehicle rear wheel well.
g.
Apply sealing compound to four capscrews (10).
h.
Install C-partition tapping plate (9) and secure with two capscrews (10) and washers (11).
Do not torque
capscrews (10).
i.
Install shim(s) (8), as required.
Torque capscrews (10) to 10 lb ft (14 N
•
m).
j.
Repeat steps a. through i. on left C-partition assembly (2) per figure 1-13, Detail B.
5)
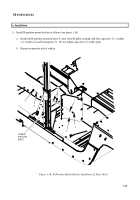
Install C-partition insulation as follows (see figure 1-14).
a.
Clean inside surface of right C-partition (1) and left C-partition (2) with denatured alcohol.
b.
Peel back protective cover on left C-partition insulation (13).
Carefully install left roof insulation (13) to
left C-partition (2) and press firmly in place.
c.
Peel back protective cover on right C-partition insulation (12).
Carefully install right C-partition
insulation (12) to right C-partition (2) and press firmly in place.
Back to Top

