TM-5-3805-254-14-P-2 - Page 189 of 894
BRAKES-AIR
TRUCK SERVICE MANUAL
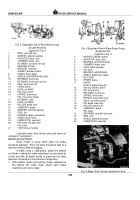
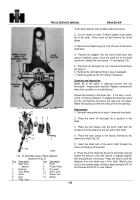
Fig. 2 Exploded View of Front Brake Group
Legend for Fig. 2
1
WASHER, adjuster spacing
2
BUSHING, camshaft bracket
3
BRACKET, w/BUSHING, camshaft
4
CAMSHAFT
5
WASHER, camshaft spacing
6
BRACKET, brake chamber
7
PLATE, w/BRACKET, backing
8
PIN, shoe anchor (4)
9
RETAINER, anchor pin
10
LINING, brake
11
SHOE, w/LINING
12
SPRING, shoe return
13
RETAINER, brake shoe roller
14
ROLLER, brake shoe
15
LUBRICATOR,
1/8 straight
16
ADJUSTER, slack, assy
17
CHAMBER, brake, assy
18
PIN, brake chamber yoke
PIN, cotter
19
YOKE, brake chamber
20
PIN, brake shoe guide
WASHER, guide pin outer
WASHER, bowed
WASHER, guide pin inner
WASHER, "C"
1.
Position the truck on floor stands and remove wheel
and drum.
2.
Remove dust shields from rear axle brake groups.
3.
Remove the shoe return spring or springs.
4.
Remove "C" washers from shoe guide pins (if so
equipped).
5.
Remove anchor pin retainers, washers, felt retainers
and felts from anchors.
6.
Remove brake shoes.
To remove brake shoes from
rear brake groups, the anchors must be removed.
To do so, remove anchor pin retainers, felt retainers,
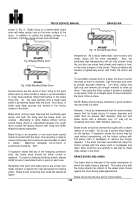
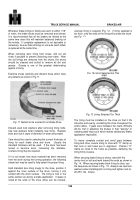
felts, lock wire and lock screws or pins (Figs. 3 and
4).
7.
The brake shoe anchors can now be re moved from
the front axle brake group by removing nut and
lockwasher from anchor then forcing the anchor from
the backing plate.
8.
Remove cam roller assemblies from brake shoes.
9.
Remove clevis pin, connecting brake chamber push
rod to slack adjuster.
Remove lock ring, cotter key
or capscrew holding the slack adjuster to end of the
camshaft.
Remove slack adjuster.
10. Push or tap the camshaft out of the spider or backing
plate bracket.
Be sure to keep spacer washers in
proper order for correct reassembly.
11. Inspect camshaft bushings and replace if necessary.
CLEANING AND INSPECTION
Clean all brake parts in cleaning fluid and wipe
them dry.
It is particularly important that brake shoes
with lining removed be cleaned thoroughly.
Use steam,
solvent or wire brush to remove all traces of rust and
corrosion.
If any rust or corrosion is allowed to remain
on the lining surface or shoe table of the shoes, it is
possible that the lining may crack while being attached to
the shoe.
Brake drums should be thoroughly cleaned.
See "Brake
Drums".
REASSEMBLY
After the various components of the brake
assemblies have been serviced, the brakes may be
reassembled by reversing the disassembly procedure.
It is recommended that newly installed brake
lining be circle ground before installing the brake drums.
Circle grinding the lining to fit drum assures full contact
between lining and drum.
The brake lining may either be circle ground
either when lining is installed on shoes (See "Brake
Lining and Shoes") or after shoes are installed on
vehicle.
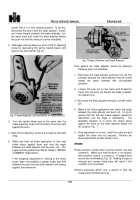
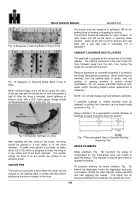
The brake shoe grinder which mounts on the
spindle is used after installing shoes with new lining (Fig.
5).
The grinder rotates about on its axis, the grinding
head equalizes the distance between the two brake shoe
lining surfaces and the drum surface.
Grind the new
lining approximately .070" less than the inside diameter
of brake drum.
Make certain that the brake is fully
released before grinding.
185
Back to Top

