TM-9-2320-272-23-4 - Page 593 of 1393
INSTALLATION - Continued
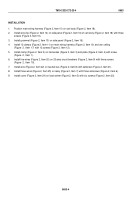
10.
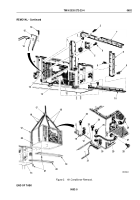
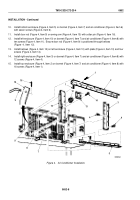
Install bottom enclosure (Figure 4, Item 5) on bonnet (Figure 4, Item 7) and air conditioner (Figure 4, Item 6)
with seven screws (Figure 4, Item 6).
11.
Install door rod (Figure 4, Item 9) on swing arm (Figure 4, Item 15) with cotter pin (Figure 4, Item 16).
12.
Install left enclosure (Figure 4, Item 10) on bonnet (Figure 4, Item 7) and air conditioner (Figure 4, Item 8) with
ten screws (Figure 4, Item 11). Ensure door rod (Figure 4, Item 9) is positioned through bellows
(Figure
4,
Item
12).
13.
Install bellows (Figure 4, Item 12) on left enclosure (Figure 4, Item 10) with plate (Figure 4, Item 13) and four
screws (Figure 4, Item 14).
14.
Install right enclosure (Figure 4, Item 3) on bonnet (Figure 4, Item 7) and air conditioner (Figure 4, Item 8) with
12 screws (Figure 4, Item 4).
15.
Install top enclosure (Figure 4, Item 2) on bonnet (Figure 4, Item 7) and air conditioner (Figure 4, Item 8) with
16 screws (Figure 4, Item 1).
10
M4040DAA
1
1
2
3
4
5
4
14
13
12
11
6
7
8
9
9
16
15
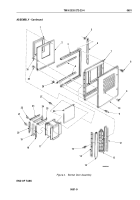
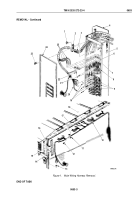
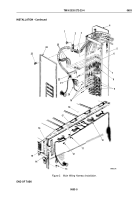
Figure 4.
Air Conditioner Installation.
TM 9-2320-272-23-4
0652
0652-8
Back to Top

