TM-9-2330-356-14
SEMITRAILER, TANK: 5000 GALLON, BULK HAUL, SELF LOAD/UNLOAD M967 AND M967A1; SEMITRAILER, TANK: 5000 GALLON, FUEL DISPENSING, AUTOMOTIVE M969 AND M969A1; SEMITRAILER, TANK: 5000 GALLON, FUEL DISPENSING, UNDER/OVERWING AIRCRAFT M970 AND M970A1
TECHNICAL MANUAL; OPERATOR’S, UNIT, DIRECT SUPPORT, AND GENERAL SUPPORT MAINTENANCE MANUAL
OCTOBER 1990
TM-9-2330-356-14 - Page 299 of 528
TM 9-2330-356-14
(e)
Trim ends of tubing to get a smooth,
square cut. Slide tubing nut onto the end of tube, install
compression sleeve over end of tube, and install tubing
insert. Connect tubing to adapter fitting and tighten
tubing nut securely. Repeat procedure on other end of
tubing.
(f)
Secure tubing with straps where needed.
e.
Control Tubing Fittings.
Use antiseize tape
(item 28, Appendix E) on all male threads. Take care not
to let any of the tape get into the system.
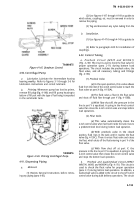
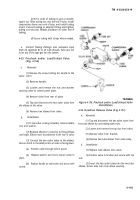
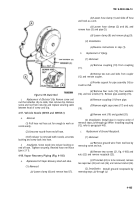
4-93. Precheck and/or Load/Unload Valve
(Fig. 4-156)
a.
Removal.
(1) Remove the screw holding the handle to the
valve stem.
(2) Remove handle.
(3) Loosen and remove the nut and washer
securing valve to control panel plate.
(4) Remove valve from rear of plate.
(5) Tag and disconnect the two nylon tubes from
the elbows at the valve.
(6) Remove two elbows from valve.
b.
Installation.
(1) If new valve is being installed, remove handle,
nut, and washer.
(2) Replace elbows in valve by turning elbows
until tight. Elbows must be positioned to the rear of valve.
(3) Connect the two nylon tubes to the elbows.
Be sure notch in threaded portion of valve is facing down.
(4)
(5)
plate.
(6)
screw.
Position valve through hole in panel.
Replace washer and nut to secure valve to
Replace handle on valve stem and secure with
TA099886
Figure 4-156. Precheck and/or Load/Unload Valve
Installation.
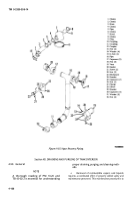
4-94. Deadman Release Valve (Fig 4-157)
a.
Removal.
(1) Tag and disconnect the two nylon tubes from
the tube elbows by unscrewing tube nuts.
(2) Loosen and remove the top nut from valve.
(3) Remove valve from bracket.
(4) Remove two tube elbows from valve body.
b.
Installation.
(1) Replace tube elbows onto valve.
(2) Position valve in bracket and secure with top
nut.
(3) Insert the two nylon tubes into the two tube
elbows. Screw tube nuts onto elbow securely.
4-163
Back to Top

