TM-9-2520-234-35 - Page 190 of 323
*C2
CHAP
5,
SEC
XXVII I
TRANSMISSION HOUSING REBUIL D
PAR
203-20 6
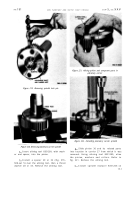
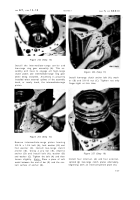
Figure 234. Removing transmission output coupling
and bearing
j . Position the transmission housing to
rest on its bottom. Using a hammer and soft
drift, drive out the output coupling and ball
bearing (fig. 234).
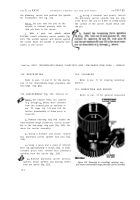
Figure 235. Transmission output coupling and bearing
removed
k . Remove the bearing from the output
coupling (fig. 235).
205. INSPECTION AND REPAIR
l . Do not remove the internal-retaining
Refer to par. 72 for general inspection
ring from the output coupling unless replace-
and repair recommendations. Repair and re-
ment is necessary (fig. 235). If necessary,
build points of measurement for fits, clear-
remove the retaining ring.
ances and wear limits are indicated by small,
lower case letters in fig. 375. fold-out 4. Re-
m . Do not remove the oil seal from the
fer to par. 238 for wear limits information.
transmission housing unless replacement is
necessary (fig. 235). If necessary, drive the
206. ASSEMBLY (fig. 375, fold-out 4)
oil seal out of the housing.
a . Install any plugs removed from the
n . If necessary, the various plugs may
transmission main housing (figs. 233 and 235).
be removed from the housing to aid in the
cleaning of the oil passages in the housing
b . Position the transmission housing on
(figs. 233 and 235).
its side. Using replacer 8351210, install the
oil seal, lip side up, in its transmission hous-
ing bore (fig. 235). Be sure the seal is firmly
204. CLEANIN G
seated against its shoulder in the housing.
Refer to par. 71 for cleaning recommen-
c. Install the bearing onto the output
dations.
coupling (fig. 235).
15 8
Back to Top


