TB-9-2350-277-40-P-1 - Page 44 of 100
TB 9-2350-277-40&P-1
INSTALLATION PROCEDURES – Continued
0005 00
0005 00-8
NOTE
Do not secure cables with tie straps until installation is complete and
the cables have been adjusted at both ends.
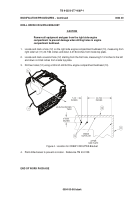
16. Route power harness (32), GPS cable (31), and RCU cable (33) behind the horizontal and
vertical ammo racks and along existing left side hull wiring, stopping at the carrier radio to radio
power connect.
NOTE
Verify main keyway of radio power connect is clocked upward.
If not
clocked upward, remove connector and reinstall with keyway upward
at the twelve o’clock position.
17. Disconnect the carrier radio connector (44) from the carrier radio power connect (42) and connect
the power harness (32) connector P1 (41) to carrier radio power connect (40).
18. Remove the protective cap (43) from primary power connect J1 (42) and connect the carrier radio
connector (44).
19. Remove screw (46) and lockwasher (38) from clamp (45). Discard screw and lockwasher.
20. Attach power harness ground strap (39) to hull with clamp (45), screw (46) and lockwasher (38).
Figure 6.
Cable Routing and Power Harness Installation
Back to Top


