TM-5-5420-202-10 - Page 443 of 535
0067
TM 5-5420-202-10
INSTALLATION
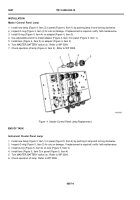
Master Control Panel Lamp
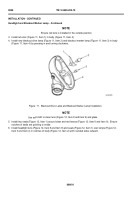
1. Install new lamp (Figure 4, Item 2) in panel (Figure 4, Item 1) by pushing lamp in and turning clockwise.
2. Inspect O-ring (Figure 4, Item 4) for cuts or damage. If replacement is required, notify f eld maintenance.
3. Install O-ring (Figure 4, Item 4) on adapter (Figure 4, Item 3).
4. Use adjustable wrench to install adapter (Figure 4, Item 3) in panel (Figure 4, Item 1).
5. Install lens (Figure 4, Item 5) on adapter (Figure 4, Item 3).
6. Turn MASTER BATTERY switch on. Refer to WP 0004.
7. Check operation of lamp (Figure 4, Item 2). Refer to WP 0008.
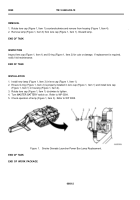
Figure 4. Master Control Panel Lamp Replacement.
END OF TASK
Instrument Cluster Panel Lamp
1. Install new lamp (Figure 5, Item 1) in panel (Figure 5, Item 4) by pushing in lamp and turning clockwise.
2. Inspect O-ring (Figure 5, Item 2) for cuts or damage. If replacement is required, notify f eld maintenance.
3. Install O-ring (Figure 5, Item 2) on lens (Figure 5, Item 3).
4. Install lens (Figure 5, Item 3) in panel (Figure 5, Item 4).
5. Turn MASTER BATTERY switch on. Refer to WP 0004.
6. Check operation of lamp. Refer to WP 0008.
0067-4
Back to Top

