TM-9-2320-272-23-3 - Page 701 of 1469
CLEANING AND INSPECTION
Clean plunger housing with lint-free cloth and inspect for cracks, breaks, chips, and pitting. Replace entire
spider if cracked, broken, chipped, or pitted.
END OF TASK
ASSEMBLY
NOTE
Apply a light film of GAA grease to all metal parts, lips of seals, and plunger housing bores
prior to assembly.
1.
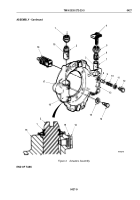
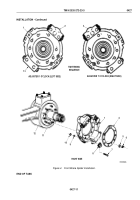
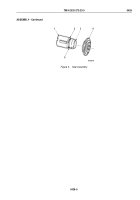
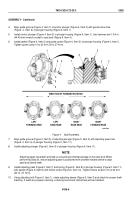
Place a piece of tape (Figure 3, Item 3) over slot of anchor plunger (Figure 3, Item 1) to protect lips of seal
(Figure 3, Item 4).
2.
Slide seal (Figure 3, Item 4) on anchor plunger (Figure 3, Item 1) until inner seal lip is in second plunger groove
(Figure 3, Item 5) and outer seal lip is in first plunger groove (Figure 3, Item 2) of anchor plunger
(Figure
3,
Item
1).
CAUTION
Anchor plungers and adjusting plungers are located vertically, opposite one another. Incorrect
location will prevent automatic adjuster from working properly.
3.
Remove tape (Figure 3, Item 3) from anchor plungers (Figure 3, Item 1).
TM 9-2320-272-23-3
0428
0428-4
Back to Top

