TM-9-2320-273-34 - Page 589 of 801
TM9-2320-273-34
b.
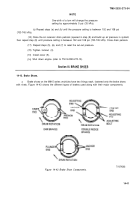
Inside every hub are two brake shoes and four brake linings. One of the linings on each shoe
may be different from the other.
Make sure you use the specified linings for the
brake shoes you are servicing. Ensure that the lin-
ing is installed in the correct position on the proper
shoe. Stopping effectiveness is directly affected by
the lining position.
Whenever you reline brake shoes, reline all the
shoes on an axle. Failure to do so will cause un-
even braking and pulling to one side.
NOTE
In this manual, the phrase shoe and lining assembly
means one brake shoe, two linings, and the rivets
holding the linings to the shoe.
A brake lining kit, in this manual, is a set of brake
linings and rivets sufficient to repair all the brake
shoes on one axle, that is, eight linings and more
than enough rivets to attach the linings to the shoes.
Clamp shoe in a vise and drill out the old rivets, then remove the linings. Use a drill bit no
Iarger in diameter than the rivet. Clean the shoe before clamping new lining in position. Use only the
rivets that come in the brake lining kit.
Make certain the lining is firmly clamped to the shoe,
locating the C-clamp as close to the rivet holes as
possible.
d.
Clamp the lining to the brake shoe with C-clamps so the rivet holes in both pieces are in
alinement.
e.
Drive the new rivets squarely into the holes with a 7/16 inch flat head drift.
f.
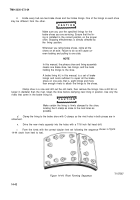
Form the rivets with
14-44 (work from heel to toe).
the correct tubular rivet set following the sequence
shown in figure
Figure 14-44. Rivet Forming Sequence.
14-42
TA 075567
CAUTIO N
CAUTIO N
Back to Top

