TM-9-2320-366-34-2 - Page 488 of 1434
TM 9-2320-366-34-2
8-8
Change 2
8-3.
TRANSFER CASE MODULE SEAL AND DRIVE YOKE REPLACEMENT
This task covers:
a.
Removal
b.
Installation
c. Follow-On Maintenance
INITIAL SETUP
Equipment Conditions
Engine shut down (TM 9-2320-366-10-1).
Tools and Special Tools
Tool Kit, Genl Mech (Item 78, Appendix B)
Goggles, Industrial (Item 28, Appendix B)
Socket Set, Impact (Item 58, Appendix B)
Wrench, Impact, Electric (Item 88, Appendix B)
Socket, Socket Wrench (TM 9-2320-366-20)
Holding Bar, Pinion (TM 9-2320-366-20)
Installer, Seal (TM 9-2320-366-20)
Hammer, Hand, Soft Head (Item 23, Appendix B)
Wrench, Torque, 0-175 lb-ft (Item 92, Appendix B)
Sling, Cargo (Item 56, Appendix B)
Tools and Special Tools (Cont)
Puller Kit, Universal (Item 51, Appendix B)
Puller, Mechanical (Item 53, Appendix B)
Multiplier Torque Wrench (Item 42, Appendix B)
Materials/Parts
Sealing Compound (Item 76.3, Appendix C)
Seal, Plain Encased (Item 393, Appendix F)
Nut, Self-Locking (Item 221, Appendix F)
Screw, Cap (4) (Item 366.1, Appendix F)
Sealant (Item 65.1, Appendix C)
Personnel Required
(2)
a. Removal.
(1)
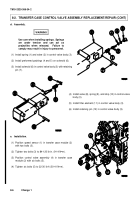
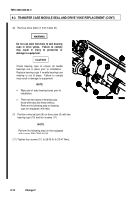
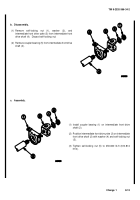
Lift tabs from two bearing cups (1).
(1.1)Remove four screws (2) and two bearing cups (1)
from drive yoke (3).
Discard screws.
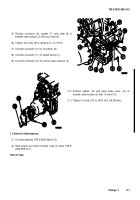
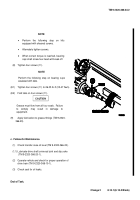
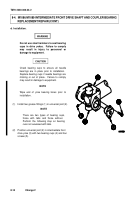
(2)
Slide drive shaft (4) from side to side and separate
universal joint (5) from drive yoke (3).
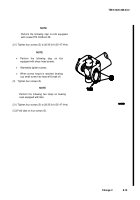
(3)
Attach drive shaft (4) to frame (6).
WARNING
Wear appropriate eye protection when
working under vehicle. Falling debris may
cause eye injury. Failure to comply may
result in injury to personnel.
NOTE
Forward and rear seals and yokes are
replaced the same way.
Rear seal and yoke
shown.
NOTE
Step (3) requires the aid of an assistant.
NOTE
There are two types of bearing cups,
those with tabs and those without.
Perform the following step on bearing
cups with tabs.
Back to Top

