TM-9-2330-356-14
SEMITRAILER, TANK: 5000 GALLON, BULK HAUL, SELF LOAD/UNLOAD M967 AND M967A1; SEMITRAILER, TANK: 5000 GALLON, FUEL DISPENSING, AUTOMOTIVE M969 AND M969A1; SEMITRAILER, TANK: 5000 GALLON, FUEL DISPENSING, UNDER/OVERWING AIRCRAFT M970 AND M970A1
TECHNICAL MANUAL; OPERATOR’S, UNIT, DIRECT SUPPORT, AND GENERAL SUPPORT MAINTENANCE MANUAL
OCTOBER 1990
TM-9-2330-356-14 - Page 246 of 528
TM 9-2330-356-14
b.
Inspection.
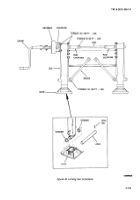
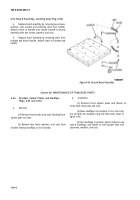
Remove objects such as nails or glass.
c.
Repair.
Refer to TM 9-2610-200-24 for
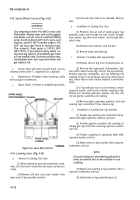
Check for apparent loss of air, unusual wear, or missing
instructions on dismounting, repair, and mounting of tire
valve caps. Replace as required.
and tube on rim.
Section XIV. MAINTENANCE OF FRAME AND TOWING
4-51.
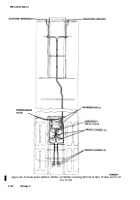
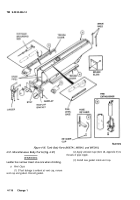
Emergency Valve Control and Cable
(Fig. 4-90)
a.
Cleaning and Inspection.
WARNING
Dry cleaning solvent P-D-680 Is toxic and
flammable. Always wear protective goggles
and gloves, and use only In a well-ventilated
area. Avoid contact with skin, eyes, and
clothes, and DO NOT breathe vapors. DO
NOT use near open flame or excessive heat.
The solvent’s flash point is 100°F-138°F
(38°C-59°C). If you become dizzy while us-
ing cleaning solvent, Immediately get fresh
air and medical help. If solvent contacts eyes,
immediately wash your eyes with water and
get medical aid.
(1) Clean control handle of valve operator A and
connecting parts, cable and emergency valve with dry
cleaning solvent (item 11, Appendix E).
(2) Inspect for cracks in control handle, frayed
cables, loose U-bolts, loose or bent cable runways, cotter
pins, and control mounting bolts.
b.
Service.
(1) Tighten any loose U-bolt c-able connectors,
adjusting bolts, and bracket mounting bolts at each end of
cable. Adjust if necessary.
(2) Lubricate all linkage.
c.
Adjustment.
(1) Ensure that control handle of valve operator
A is pushed in and that the emergency valve is closed. Pull
on handle of the emergency valve shutoff at front curbside
of semitrailer to maintain shutoff handle in the open
position.
(2) Loosen U-bolt connectors to loosen cable
end connections.
(3) Remove all slack in cables, then tighten
U-bolt connectors.
(4) Cheek
ATTACHMENTS
that emergency valve will open and
close when control handle of valve operator A is operated.
(5) Pull on valve operator A to open emergency
valve. Check that pulling on the emergency valve shut-off
handle will close the emergency valve.
(6) Repeat steps (1) through (5) if cables do not
function properly.
d.
Removal. Tag
and disconnect control cables from
the emergency valve control. Remove two capscrews and
nuts that secure control to side of cabinet. Remove valve
control.
e.
Disassembly and Assembly (Fig.
4-90).
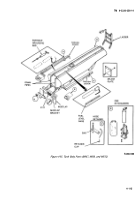
(1) Remove roll pin (8, fig. 4-90) securing shaft
(9) to bracket (7).
(2) Remove shaft (9). Remove lever (1) and the
trip bar assembly (10).
(3) Remove cotter pin (12) and clevis pin (13) that
secures offset link (2) to handle(l). Remove offset link(2).
(4) Disassemble further if needed (fig. 4-90).
(5) Reassemble by reversing steps (1) through
(4).
f.
Installation.
(1) Mount emergency valve control in place
using two nuts and capserews.
(2) Reconnect the cables and adjust (step c).
4-52. Upper Coupler/Kingpin Assembly
a.
Service.
(1)
Remove dust, dirt, and old grease from
kingpin.
(2) Grease liberally with clean grease (item 17,
Appendix E).
(3) If semitrailer has a bolt-on kingpin, check
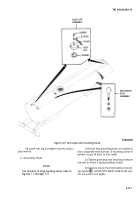
tightness of bolts holding kingpin to plate (fig. 4-91).
4-110
Back to Top

