TM-9-2350-260-20-1-2 - Page 373 of 772
TM 9-2350-260-20-1-2
AIR CLEANER DOOR REPLACEMENT (TOP LOADING) (Sheet 2 of 2)
REPAIR:
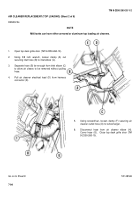
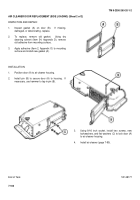
1.
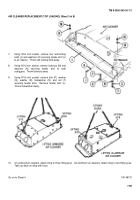
Inspect screws (A) and gasket (B).
2.
If gasket (B) is damaged in any way, replace it.
3.
Apply sealing compound (Item 24, Appendix D),
on new gasket (B).
Install gasket into groove at
underside of door (C).
4.
Replace decal (D), as necessary.
Install decal so
It can be read from center of tank.
INSTALLATION:
NOTE
Check three door bolts and bolt holes
on top of air cleaner.
If bolt threads
are stripped, replace bolts.
If holes
are
not
drilled
through,
use
compressed air to remove sand, dirt,
or debris from holes.
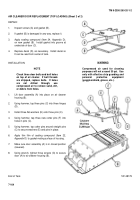
1.
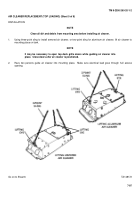
Lift door assembly (A) into place on air cleaner
housing (B).
2.
Using hammer, tap three pins (C) into three hinges
(D).
3.
Install three flat washers (E) onto three pins (C).
4.
Using hammer, tap three new cotter pins (F) into
holes in pins (C).
5.
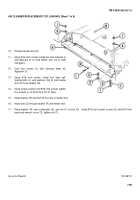
Using hammer, tap cotter pins around straight pins
(C) to secure washers (E) and pins in place.
6.
Apply thin film of sealing compound (Item 22,
Appendix D) to gasket mating surface of housing.
7.
Make sure door assembly (A) is in closed position
(lowered).
8.
Using wrench, tighten three screws (G) to secure
door (A) to air cleaner housing (B).
WARNING
Compressed air used for cleaning
purposes will not exceed 30 psi.
Use
only with effective chip guarding and
personal
protective
equipment
(goggles/shield, gloves, etc.).
End of Task
TA148179
7-104
Back to Top

