TM-9-2815-205-24 - Page 242 of 856
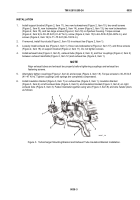
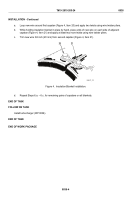
REMOVAL - Continued
NOTE
Remove nut from T-bolt to loosen coupling. Keep nut and T-bolt together with coupling.
2.
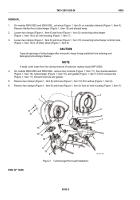
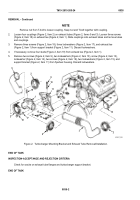
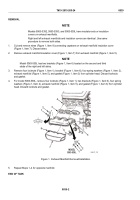
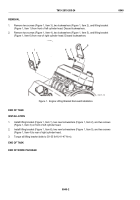
Loosen four couplings (Figure 2, Item 2) on exhaust tubes (Figure 2, Items 5 and 3). Loosen three screws
(Figure 2, Item 18) on exhaust tee (Figure 2, Item 1). Slide couplings onto exhaust tubes and remove tubes
and couplings.
3.
Remove three screws (Figure 2, Item 18), three lockwashers (Figure 2, Item 17), and exhaust tee
(Figure 2, Item 1) from support bracket (Figure 2, Item 11). Discard lockwashers.
4.
If necessary, remove four studs (Figure 2, Item 19) from exhaust tee (Figure 2, Item 1).
5.
Remove two screws (Figure 2, Item 9), two lockwashers (Figure 2, Item 10), screw (Figure 2, Item 13),
lockwasher (Figure 2, Item 14), two screws (Figure 2, Item 16), two lockwashers (Figure 2, Item 15), and
support bracket (Figure 2, Item 11) from flywheel housing. Discard lockwashers.
1
5
2
2
2
2
3
9
10
11
12
13
14
16
15
17
18
19
MAINT_099
Figure 2.
Turbocharger Mounting Bracket and Exhaust Tube Removal/Installation.
END OF TASK
INSPECTION-ACCEPTANCE AND REJECTION CRITERIA
Check for cracks on exhaust tube flanges and turbocharger support bracket.
END OF TASK
TM 9-2815-205-24
0038
0038-2
Back to Top


