TM-9-2815-205-24 - Page 243 of 856
INSTALLATION
1.
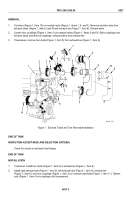
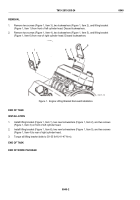
Install support bracket (Figure 2, Item 11), two new lockwashers (Figure 2, Item 10), two small screws
(Figure 2, Item 9), new lockwasher (Figure 2, Item 14), screw (Figure 2, Item 13), two new lockwashers
(Figure 2, Item 15), and two large screws (Figure 2, Item 16) on flywheel housing. Torque screws
(Figure 2, Item 9) to 30–35 lb-ft (41–47 N·m), screw (Figure 2, Item 13) to 46–50 lb-ft (62–68 N·m), and
screws (Figure 2, Item 16) to 71–75 lb-ft (96–102 N·m).
2.
If removed, install four studs (Figure 2, Item 19) in exhaust tee (Figure 2, Item 1).
3.
Loosely install exhaust tee (Figure 2, Item 1), three new lockwashers (Figure 2, Item 17), and three screws
(Figure 2, Item 18) on support bracket (Figure 2, Item 11). Do not tighten screws.
4.
Install exhaust tube (Figure 2, Item 5), exhaust tube (Figure 2, Item 3), and four couplings (Figure 2, Item 2)
between exhaust manifolds (Figure 2, Item 12) and exhaust tee (Figure 2, Item 1).
NOTE
Align exhaust tubes and exhaust tee properly before tightening couplings and exhaust tee
fastening screws.
5.
Alternately tighten couplings (Figure 2, Item 2) and screws (Figure 2, Item 18). Torque screws to 30–35 lb-ft
(41–47 N·m). Tighten couplings until springs are completely compressed.
6.
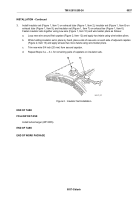
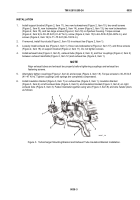
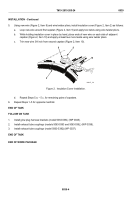
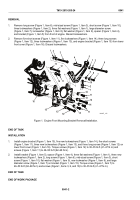
Install insulation blanket (Figure 3, Item 7) on exhaust tee (Figure 3, Item 1), insulation blanket
(Figure 3, Item 6) on left exhaust tube (Figure 3, Item 5), and insulation blanket (Figure 3, Item 4) on right
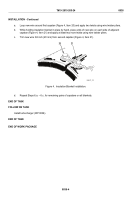
exhaust tube (Figure 3, Item 3). Fasten blankets together using wire (Figure 3, Item 8) and wire twister pliers
as follows:
1
2
3
2
4
2
6
7
8
5
MAINT_100
Figure 3.
Turbocharger Mounting Bracket and Exhaust Tube Insulation Blanket Installation.
TM 9-2815-205-24
0038
0038-3
Back to Top

