MERITOR-TP-9853 - Page 12 of 32
Section 2
Disassemble Brakes
8
Section 2
Disassemble Brakes
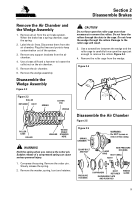
WARNING
To prevent serious eye injury, always wear safe
eye protection when you perform vehicle
maintenance or service.
Park the vehicle on a level surface. Block the
wheels to prevent the vehicle from moving.
Support the vehicle with safety stands. Do not
work under a vehicle supported only by jacks.
Jacks can slip and fall over. Serious personal injury
can result.
Remove all pressure from the air system before
you disconnect any components. Pressurized air
can cause serious personal injury.
When you work on a spring chamber, carefully
follow the service instructions of the chamber
manufacturer. Sudden release of a compressed
spring can cause serious personal injury.
ASBESTOS AND NON-ASBESTOS
FIBERS WARNING
Some brake linings contain asbestos fibers, a
cancer and lung disease hazard. Some brake
linings contain non-asbestos fibers, whose
long-term effects to health are unknown. You
must use caution when you handle both asbestos
and non-asbestos materials.
Remove the Brake Shoes
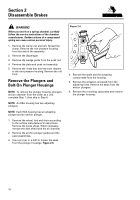
WARNING
When you work on a spring chamber, carefully
follow the service instructions of the chamber
manufacturer. Sudden release of a compressed
spring can cause serious personal injury.
Remove the wheel, hub and drum according to the
vehicle manufacturer’s instructions.
NOTE:
When necessary, use an adjusting spoon
to turn the adjusters and retract the shoes from
the drum. Meritor KIT 1184 includes an adjusting
spoon plus a brake spring tool and a seal driver.
The kit or the individual tools are available from
Meritor Aftermarket Parts and Services, 7975 Dixie
Highway, Florence, KY 41042.
Remove the shoes as follows:
RSA Brakes (Figure 2.1)
a. Use a brake spring tool to remove the
return spring.
b. Remove the anti-rattle rods: Compress the
spring and twist the rod, so that its tabs fit
through the retainer slots.
c. Remove the snap rings from the anchor
pins.
d. Remove the shoes.
RDA Brakes (Figure 2.2)
a. Use a brake spring tool to remove the return
springs.
b. Remove the shoes.
Figure 2.1
Figure 2.2
A
B
C
D
D
B
RSA BRAKE
A
B
B
RDA BRAKE
Back to Top

