TM-5-3805-254-14-P-2 - Page 397 of 894
TRUCK SERVICE MANUAL
ENGINE
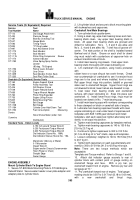
Service Tools (Or Equivalent) Required
Service
Tool
Tool Number
Name
ST-112
Dial Gauge Attachment
ST-435
Pressure Gauge
ST-487
Blow-By Checking Tool
ST-547
Gauge Block
ST-593
Timing Fixture
ST-835
"O" Ring Loader
ST-997
Seal And Sleeve Driver
ST-1172
Seal Mandrel
ST-1173
Seal Mandrel
ST-1 176
Piston Ring Compressor
Sleeve
ST-1170
Injector Indicator
ST-1182
Valve Spring Spray Nozzle
Locator
(80 deg.
Tilt Engine)
ST-1193
Rocker Lever Actuator
ST-1229
Liner Driver
ST-1259
Seal Mandrel (Teflon Seal)
ST-1260
Seal Pilot (Teflon Seal)
Desirable (Or Equivalent) Service Tools
ST-163
Engine Support Stand
ST-386
Pulley Assembly Tool
ST-406
Drill Reamer Fixture
ST-548
Engine Rebuild Stand
ST-669
Torque Wrench Adapter
ST-763
Piston Ring Expander
ST-756
Engine Lifting Fixture
ST-805
Block Mounting Plate
ST-968
Belt Gauge
ST-1138
Belt Gauge
ST-1184
Cylinder Liner Hold-Down Tool
ST-1190
Fuel Consumption
Measuring
Device
None Smoke Meter (order from
Cummins
Distributors)
Standard Tools - Obtain Locally
0-150 Inch-pound Torque Wrench
0-250 Foot-pound Torque Wrench
0-600 Foot-pound Torque Wrench
Dial Indicator (Starret No.
196A)
Dial Indicator Sleeve (Starret No.
196-
L)
Manometer (Mercury or Water)
0-1 Micrometer
Impact Wrench
Engine and/or Chassis Dynamometer
Hoist (Power or Chain)
Straight Edge
Feeler Gauge
ENGINE ASSEMBLY
Mount Cylinder Block To Engine Stand
1.
Secure ST-805 Block Mounting Plate to ST-548 Engine
Rebuild Stand.
Secure water header cover plate adapter and
adapter plate to cylinder block.
2.
Lift cylinder block and secure to block mounting plate
with lockwashers and capscrews.
Crankshaft And Main Bearings
1.
Turn cylinder block upside-down.
2.
Using a clean rag, wipe main bearing bores and main
bearing shells clean.
Lay upper main bearing shells in
block.
All upper main bearing shells are grooved and
drilled for lubrication.
No’s.
1, 3 and 5 are alike and
No’s.
2, 4 and 6 are alike; No.
7 shell has oil groove off-
center.
The wide portion of the shell is installed toward
flywheel end of block.
Groove on each shell for dowel
ring must match with counterbore at capscrew hole on
exhaust manifold side of block.
3.
Install main bearing ring dowels.
Coat upper main
bearing shells thoroughly with clean lubricating oil.
4.
Lift crankshaft into position, using hooks protected
with
rubber hose or a rope sling at two crank throws.
Check
rear counterweight of crankshaft to see if oversize thrust
rings are to be used and where installed, front or rear.
Roll upper thrust rings into position, babbitt or grooved
sides next to crankshaft flanges.
Upper thrust rings are
not doweled to block; lower halves are doweled to cap.
5, Coat lower main bearing shells and crankshaft
surface, with clean lubricating oil.
Snap into place over
crankshaft.
6.
Install lower thrust rings, rings must be
located over dowels in No.
7 main bearing cap.
7.
Install main bearing caps with numbers corresponding
to those stamped on block on camshaft side of engine.
8.
Lubricate main bearing capscrew threads with clean
engine lubricating oil, coat under head of capscrew and
lockplates with SAE 140W gear lubricant and install
lockplates, start each capscrew; tighten alternately and
slowly, to set caps into position.
9.
Tighten main bearing capscrews by template method.
a.
Tighten main bearing capscrews to 140 to 150 ft-lbs
[19.4 to 20.7 kg ml .
b.
Continue to tighten capscrews to 300 to 310 ft-lbs
[41.5 to 42.9 kg ml to "set" shells, caps and lockplates.
c.
Loosen completely; retighten to 140 to 150 ft-lbs [19.3
to 20.7 kg ml .
d.
Tighten both capscrews on each cap alternately and
evenly to 300 to 310 ft-lbs [41.5 to 42.9 kg ml torque.
Note:
There are two torque methods which are
acceptable:
Template and Torque method.
Refer to Groups 1 and 8.
10.
Attach dial indicator gauge securely to rear of
cylinder block with contact point of gauge resting on
crankshaft flange end face.
With a pry bar, pry
crankshaft toward front of engine.
Remove pry bar and
set gauge at "O."
11.
Pry crankshaft toward rear of engine.
Total gauge
reading should be 0.007 to 0.017 inch [0.18 to 0.43 mm],
with
a
new
crankshaft
and
thrust
rings.
393
Back to Top

