TM-9-2320-361-20 - Page 165 of 1207
TM 9-2320-361-20
Table 2-4. Electrical Troubleshooting (Contd).
MALFUNCTION
TEST OR INSPECTION
CORRECTIVE ACTION
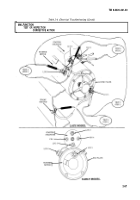
Test 1. Test for battery voltage at pin 1 of starter solenoid with accessory/ignition switch turned to
ON position.
Step 1. Push start button and listen for starter solenoid to create a “thump” sound when energized.
a. If “thump” sound is heard, go to step 2.
b. If “thump” sound is not heard, go to step 3.
Step 2. Check lead 6 at starter solenoid for battery voltage.
a. Check for seized engine. Refer to table 2-2, Mechanical Troubleshooting, malfunction 1,
step 3.
b. If voltage is present but less than 19 Vdc, check for corrosion and/or loose connections.
c. If engine is not seized, replace starter motor (para. 4-7).
d. If no voltage is present and engine still fails to start, go to step 3.
Step 3. Check lead 214 for battery voltage at pin 1 of starter solenoid.
a. If voltage is not present, go to test 2.
b. If voltage is present and solenoid does not engage starter motor, proceed to step 4.
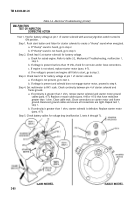
Step 4. Set multimeter to RX1 scale. Check continuity between pin 4 of starter solenoid and
frame ground.
a. If continuity is greater than 1 ohm, remove starter solenoid and starter motor ground
cables (para. 4-7). Replace or repair cables (para. 4-48 or 4-51) that have resistance
greater than 1 ohm. Clean cable ends. Clean connections on starter motor and frame
ground. Reconnect ground cables and ensure all connections are tight. Repeat test 1,
step 1.
b. If continuity is greater than 1 ohm, starter solenoid is defective. Replace starter motor
(para. 4-7).
Step 5. Check battery cables for voltage drop (malfunction 3, tests 4 through 7).
2-80
Back to Top


