TM-9-2815-205-34 - Page 333 of 596
TM 9-2815-205-34
(4) Connecting Rod Bearings
(a)
(b)
Inspect bearing shells for scoring, pitting, flaking, etching, and dirt grooving. If defective,
discard bearing shells.
Discard bearing shells with bright spots on backs indicating movement in bearing caps or
supports.
NOTE
If one bearing shell is less than minimum thickness shown in Table 3-7, replace both
bearing shells (upper and lower).
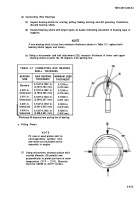
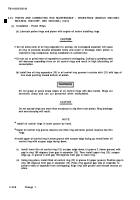
(c) Using a micrometer and ball attachment (25), measure thickness of lower and upper
bearing shells at point (A), 90 degrees from parting line.
TABLE 3-7. CONNECTING ROD BEARING
SHELL THICKNESS
BEARING
NEW BEARING
MINIMUM USED
SIZE
THICKNESS
THICKNESS
Standard
0.1247-0.1252 in.
0.1230 in.
(3.167-3.180 mm)
(3.124 mm)
0.002 in.
0.1257-0.1262 in.
0.1240 in.
Undersized
(3.193-3.205 mm)
(3.150 mm)
0.010 in.
0.1297-0.1302 in.
0.1280 in.
Undersized
(3.294-3.307 mm)
(3.251 mm)
0.020 in.
0.1347-0.1352 in.
0.1330 in.
Undersized
(3.421-3.434 mm)
(3.378 mm)
0.030 in.
0.1397-0.1402 in.
0.1380 in.
Undersized
(3.548-3.561 mm)
(3.505 mm)
Thickness 90 degrees from parting line of bearing.
e. Fitting Piston
NOT E
Fit new or used piston skirt to
corresponding cylinder liner
and retain as a matched set for
assembly in engine.
(1)
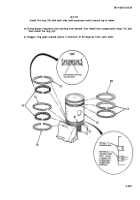
Using micrometer, measure piston skirt
outside diameter (B) parallel and
perpendicular to piston pin bore at room
temperature (70°F – 21°C). Diameter
must be 3.8695 to 3.8717 inches.
3-203
Back to Top


