TM-9-2815-205-34 - Page 335 of 596
TM 9-2815-205-34
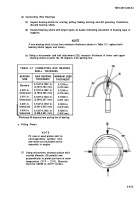
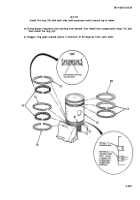
f. Fitting Piston Rings
(1) Insert top piston ring inside cylinder liner
(2) in normal area of ring travel. Using
piston skirt, push ring down parallel with
top of liner. Measure ring gap with
thickness gage set. Refer to Table 3-8
for specifications. Repeat procedure for
balance of compression and oil rings.
CAUTION
File or stone both ends of fire
and compression rings from
outer surface to inner surface
to prevent chipping or peeling
of chrome plating on ring.
TABLE 3-8. PISTON RING SPECIFICATIONS
MINIMUM
MAXIMUM
RING GAP
Fire Ring
0.0230 in.
0.0380 in.
(0.584 mm)
(0.965 mm)
Two Compression Rings
0.0200 in.
0.0300 in.
(0.508 mm)
(0.762 mm)
Upper Oil Control Ring
0.0070 in.
0.0170 in.
(0.1 78 mm)
(0.432 mm)
Two Lower Oil Control Rings
0.0100 in.
0.0250 in.
(0.254 mm)
(0.635 mm)
CLEARANCE (RING TO GROOVE)
Top Groove
0.0030 in.
0.0066 in.
(0.076 mm)
(0.168 mm)
Second Groove
0.0070 in.
0.0100 in.
(0.178 mm)
(0.254 mm)
Third Groove
0.0050 in.
0.0080 in.
(0.127 mm)
(0.203 mm)
Upper Oil Control Ring Groove
0.0005 in.
0.0040 in.
(0.013 mm)
(0.102 mm)
Lower Oil Control Ring Groove
0.0015 in.
0.0055 in.
(0.038 mm)
(0.140 mm)
(2) File ends of compression ring if ring gap
is too small. Ends of ring must remain
square and chamfer on outer edge must
be approximately 0.015 inch.
.
3-205
Back to Top


