TM-5-3805-254-14-P-2 - Page 349 of 894
TRUCK SERVICE MANUAL
ENGINE
7.
Remove unit from cylinder block and sandpaper rough
edges from top and bottom of cut and clean with
compressed
air.
Note
: If tool bit is changed, be sure and reset new tool bit.
Installing Repair Sleeve Into Cylinder Block
1.
Push
sleeve, Part No.
195778, through upper bore and install
sleeve driver when sleeve is positioned in lower bore.
2.
Place sleeve and driver as a unit in position to go into
lower bore, insert driver handle.
Note
: Inside diameter chamfer of sleeve to be toward deck.
3.
Install locator over driver handle and into counterbore.
4.
Tap gently on driver handle until sleeve is located on
starting radius, then drive sleeve into place.
When sleeve is in
correct position, the sleeve drive handle will become free for
removal.
Note
:
This tool is also used when machining the lower bore
entry chamfer.
If erosion has occurred, the chamfer area
may be built up by the use of a plastic steel compound (follow
manufacturers instructions) and resurfaced.
Follow above
instructions using ST-1096-2 Spacer and ST-1096-4
Tool Bit
when remachining chamfer.
ST-1252 Concentricity Gauge
Check the cylinder liner counterbore to lower bore
concentricity as follows:
1.Place gauge flat on top deck of cylinder block with bumper
pins against counterbore inside diameter.
2.
Raise or lower bar to position indicator in area of lower
bore to be checked.
3.
Holding gauge bumper pins firmly against counterbore
inside diameter, zero indicator.
4.
Release pressure, reposition gauge to check indicator
reading.
Rezero indicator if necessary.
5.
Place gauge 180 deg.
from original setting position,
hold bumper pins firmly against counterbore inside diameter,
record indicator reading.
6.
Move gauge 90 deg. and repeat procedure.
Note
:
Indicator readings recorded are two (2) times actual
shift of bore.
(Example: Indicator reading 0.002 inch [0.05
mm].
Actual shift from center of bore 0.001 inch [0.03 mm].
ST-1168 Cylinder Liner Counterbore Salvage Tool
This tool is used to enlarge damaged counterbores for the
installation of salvage sleeve or bores that have been
reworked to maximum depth.
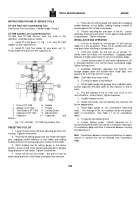
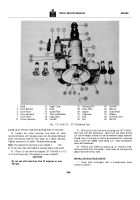
ASSEMBLY OF TOOL
1.Assemble and secure adapter plate (ST-1168-28), (Fig. 1-
15) to main body.
2.
Assemble tool holder (ST-116839) on shaft of main
body (1168) and secure with nut (ST-1168-33) and washer
(ST-1 168-34).
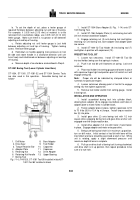
MACHINING THE BLOCK
1.Remove cutting tool from (ST-1 16839) holding plate.
2.
Place boring machine on cylinder block above bore to
be cut and hand start mounting capscrews.
Capscrew
spacers (ST-1168-29 or 40) must be on capscrews.
3.
Lower tool holder into bore by pulling up on orifice
retractor knob (ST-1168-14) while pushing down on set collar
(ST-1 168-12).
4.
Tool holder lower diameter is used to center machine
in counterbore inside diameter.
Push tool holder lower
locating diameter into counterbore and tighten four mounting
capscrews alternately to 25 to 35 ft-lbs [3.5 to 4.1 kg m]
torque.
5.
Retract tool holder by pulling up on orifice retractor
knob (ST-1 168-14).
6.
Loosen setscrew (ST-1168-23) in back end of tool bit
and push adjustable set pin (ST-1168-21) all the way in.
Lock
setscrew.
7.
Adjust micrometer (ST-1168-25) to 6.750 inch [171.45
mm] .
8.
Place tool bit (ST-1168-19) in tool bit gauge and hold
firmly against stop and hardened pad (ST-1168-27).
Loosen
setscrew and allow adjustable set pin to come out against
micrometer spindle.
Lock setscrew.
9.
As a further check, back off thimble on micrometer and
recheck tool bit length again.
10.
Insert tool bit into tool holder and tighten lockscrew
(ST-1168-20).
Tool bit must be held all the way in against tool
holder.
11.
Turn tool holder until tool bit recess is at large opening
in (ST-1168-28) adapter plate.
12.
Place a 0.004 inch [0.10 mm]feeler gauge between
block and tool bit and lower tool bit onto feeler gauge by
345
Back to Top

