TM-9-2330-342-23-P - Page 469 of 1348
FIELD MAINTENANCE
FLATRACK LOCK SENSOR REPLACEMENT
INITIAL SETUP:
Tools and Special Tools
Tool Kit, General Mechanic's: Automotive
(WP
0194, Table 1, Item 47)
Materials/Parts
Cable Ties (WP
0193, Table 1, Item 11)
Locknut Qty:
2 (WP
0195, Table 1, Item 3)
Locknut Qty:
9 (WP
0195, Table 1, Item 66)
References
Fig. 1 (WP
0136)
Equipment Condition
Wheels chocked (TM 9-2330-342-10). (WP
0190)
Load lock status line disconnected from vehicle
(TM 9-2330-342-10). (WP
0190)
Flatrack locks on sensor side caged. (WP
0105)
REMOVAL
CAUTION
Remove paint from screw threads prior to removing locknuts, or damage to screw threads
may result.
1.
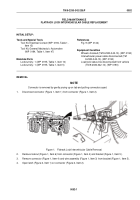
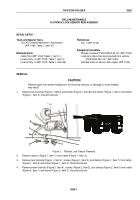
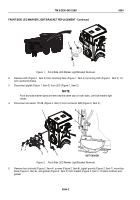
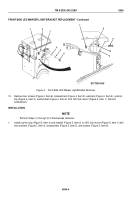
Remove two locknuts (Figure 1, Item 2) and screws (Figure 1, Item 8) from sensor (Figure 1, Item 1) and frame
(Figure 1, Item 3). Discard locknuts.
1
8
6
5
4
7
2
3
Figure 1.
Flatrack Lock Sensor Removal.
2.
Remove sensor (Figure 1, Item 1) from frame (Figure 1, Item, 3).
3.
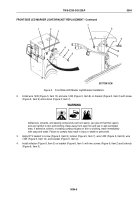
Remove two locknuts (Figure 1, Item 4), screws (Figure 1, Item 5), and clamps (Figure 1, Item 7) from cable
(Figure 1, Item 6) and frame (Figure 1, Item 3). Discard locknuts.
4.
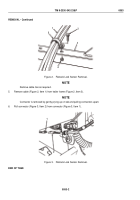
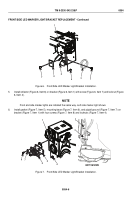
Remove seven locknuts (Figure 2, Item 4), screws (Figure 2, Item 2), and clamps (Figure 2, Item 5) from cable
(Figure 2, Item 1) and frame (Figure 2, Item 3). Discard locknuts.
TM 9-2330-342-23&P
0053
0053-1
Back to Top

