TM-9-2330-342-23-P - Page 481 of 1348
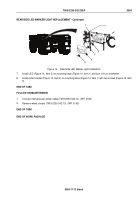
REAR/SIDE LED MARKER LIGHT REPLACEMENT - Continued
1
1
2
3
5
4
6
7
8
9
10
11
12
13
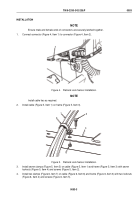
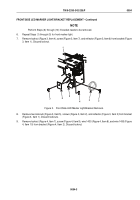
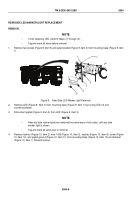
Figure 10.
Rear/Side LED Marker Light Removal.
5.
Disconnect 489 connector (Figure 10, Item 6) from 1012B connector (Figure 10, Item 7).
6.
Remove locknut (Figure 10, Item 4), washer (Figure 10, Item 5), screw (Figure 10, Item 13), mounting base
(Figure 10, Item 10), and gasket (Figure 10, Item 9) from bracket (Figure 10, Item 1). Discard locknut and
gasket.
NOTE
For removal of rear facing LED marker light bracket (Figure 11, Item 3), perform Steps (7)
and (8).
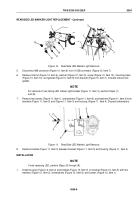
7.
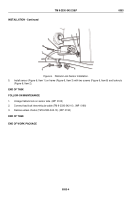
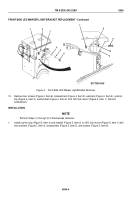
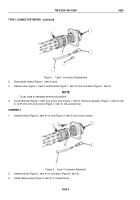
Remove two screws (Figure 11, Item 1), lockwashers (Figure 11, Item 6), and washers (Figure 11, Item 2) from
brackets (Figure 11, Item 5) and (Figure 11, Item 3) and housing (Figure 11, Item 4). Discard lockwashers.
3
4
5
6
1
2
Figure 11.
Rear/Side LED Marker Light Removal.
8.
Remove bracket (Figure 11, Item 3) between bracket (Figure 11, Item 5) and housing (Figure 11, Item 4).
INSTALLATION
NOTE
If only replacing LED, perform Steps (6) through (8).
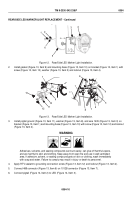
1.
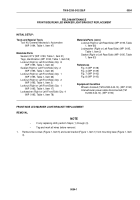
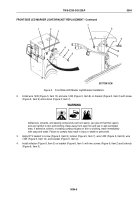
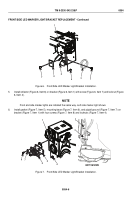
Install housing (Figure 12, Item 4) and bracket (Figure 12, Item 3) on bracket (Figure 12, Item 5) with two
washers (Figure 12, Item 2), lockwashers (Figure 12, Item 6), and screws (Figure 12, Item 1).
TM 9-2330-342-23&P
0054
0054-9
Back to Top

