TM-9-2330-342-23-P - Page 482 of 1348
REAR/SIDE LED MARKER LIGHT REPLACEMENT - Continued
3
4
5
6
1
2
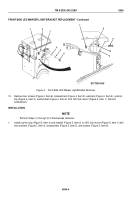
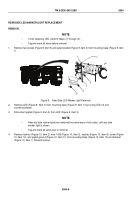
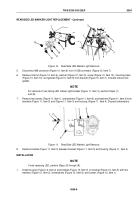
Figure 12.
Rear/Side LED Marker Light Installation.
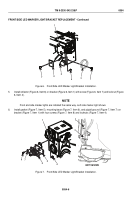
2.
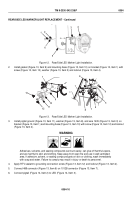
Install gasket (Figure 13, Item 9) and mounting base (Figure 13, Item 10) on bracket (Figure 13, Item 1) with
screw (Figure 13, Item 13), washer (Figure 13, Item 5) and locknut (Figure 13, Item 4).
1
1
2
3
5
4
6
7
8
9
10
11
12
13
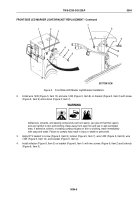
Figure 13.
Rear/Side LED Marker Light Installation.
3.
Install pigtail ground (Figure 13, Item 11), washer (Figure 13, Item 8), and wire 1435 (Figure 13, Item 3) on
bracket (Figure 13, Item 1) and mounting base (Figure 13, Item 10) with screw (Figure 13, Item 12) and locknut
(Figure 13, Item 2).
WARNING
Adhesives, solvents, and sealing compounds can burn easily, can give off harmful vapors,
and are harmful to skin and clothing. Keep away from open fire and use in well-ventilated
area. If adhesive, solvent, or sealing compound gets on skin or clothing, wash immediately
with soap and water. Failure to comply may result in injury or death to personnel.
4.
Apply RTV sealant to grounding connection screw (Figure 13, Item 12) and locknut (Figure 13, Item 2).
5.
Connect 489 connector (Figure 13, Item 6) on 1012B connector (Figure 13, Item 7).
6.
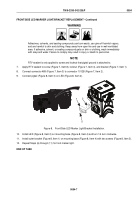
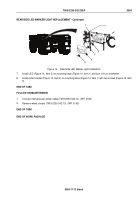
Connect pigtail (Figure 14, Item 2) to LED (Figure 14, Item 3).
TM 9-2330-342-23&P
0054
0054-10
Back to Top

