TM-9-2330-342-23-P - Page 828 of 1348
REMOVAL - Continued
2.
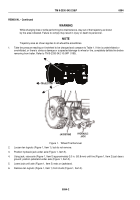
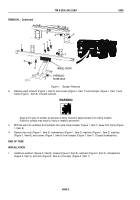
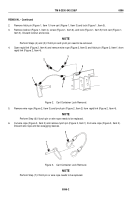
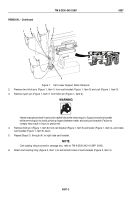
Remove hitch pin (Figure 1, Item 1) from cart (Figure 1, Item 3) and lock (Figure 1, Item 5).
3.
Remove locknut (Figure 1, Item 4), screw (Figure 1, Item 6), and lock (Figure 1, Item 5) from cart (Figure 1,
Item 3). Discard locknut and screw.
NOTE
Perform Steps (4) and (5) if hitch pin and lynch pin need to be removed.
4.
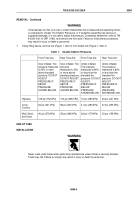
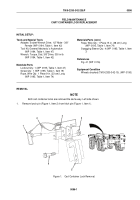
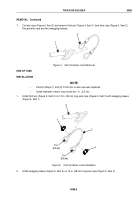
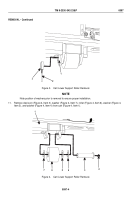
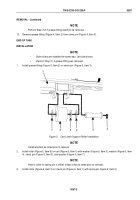
Open rapid link (Figure 2, Item 4) and remove wire rope (Figure 2, Item 5) and hitch pin (Figure 2, Item 1) from
rapid link (Figure 2, Item 4).
1
2
3
5
4
Figure 2.
Cart Container Lock Removal.
5.
Remove wire rope (Figure 2, Item 3) and lynch pin (Figure 2, Item 2) from rapid link (Figure 2, Item 4).
NOTE
Perform Step (6) if lynch pin or wire rope needs to be replaced.
6.
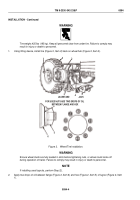
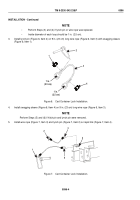
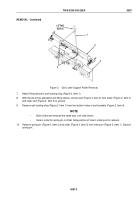
Cut wire rope (Figure 3, Item 2) and remove lynch pin (Figure 3, Item 1) from wire rope (Figure 3, Item 2).
Discard wire rope and two swagging sleeves.
1
2
Figure 3.
Cart Container Lock Removal.
NOTE
Perform Step (7) if hitch pin or wire rope needs to be replaced.
TM 9-2330-342-23&P
0096
0096-2
Back to Top

