TM-9-2350-311-20-2 - Page 346 of 828
TM 9–2350–311–20–2
6–30
Change 2
6–11 ACCUMULATOR ASSEMBLY (PRIMARY)
This task covers:
a.
Removal
b.
Service
c.
Test-Leakage
d.
Installation
INITIAL SETUP
Tools
Artillery and turret mechanic’s tool kit
(SC 5180–95–CL–A12)
Materials/Parts
Caps and plugs (item 7, Appx D)
Locknut (item 3, Appx G)
Lockwashers (4) (item 56, Appx G)
Preformed packing (item 47, Appx G)
Preformed packing (item 48, Appx G)
Equipment Condition
Discharge hydraulic pressure (para 6–3.1)
a.
Removal
CAUTION
All hydraulic lines and ports must be capped to prevent contaminants from entering the hydraulic
system and causing internal damage to hydraulic components.
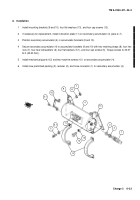
1
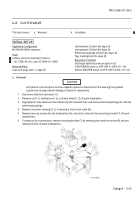
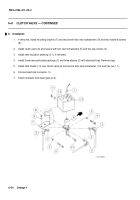
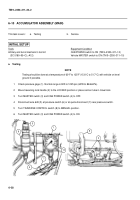
Disconnect lines to tube tee and remove tube tee at primary accumulator assembly (para 6–25).
2
Remove locknut (1), flat washer (2), two preformed packings (3), and bushing (4) from primary accumulator
(5). Discard locknut and preformed packings.
3
Remove two cap screws (5.1) and retaining strap (5.2) from end of primary accumulator (5).
4
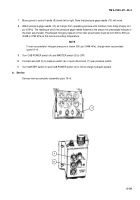
While supporting primary accumulator (5), remove two cap screws (6), two flat washers (6.1), two
lockwashers (7), two hex nuts (8), and retaining strap (9) from each mounting bracket (10 and 11). Discard
lockwashers.
5
Remove primary accumulator (5).
6
If necessary for replacement, remove identification marker (12) from primary accumulator (5).
7
Remove two cap screws (13), two cap screws (14), four flat washers (15), and mounting brackets (10 and
11).
b.
Service
Service primary accumulator assembly (para 19–5).
c.
Test–Leakage
1
Plug hydraulic tube hole in primary accumulator (5).
2
Submerge primary accumulator (5) completely in water for at least ten minutes. There must be no evidence
of leakage during entire period.
3
Replace primary accumulator (5) if it leaks.
Back to Top

