TM-9-2350-311-34-2 - Page 252 of 552
TM 9-2350-311-34-2
5-14
ACTUATOR AND FOLLOWER ASSEMBLIES - CONTINUED
a. Removal - Continued
3
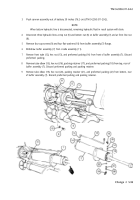
Remove hex nut (11), lockwasher (12), lever (13), and woodruff key (14) from actuator housing (15). Discard
lockwasher.
4
Elevate cannon assembly, remove upper front cap screw (16) and lockwasher (17). Discard lockwasher.
5
Depress cannon assembly and remove three cap screws (18) and three lockwashers (19). Discard lock-
washers.
6
Using prybar, pry actuator housing (15) from mount. Two pin assemblies (20) may come off with actuator
housing or stay in mount.
7
Move actuator housing (15) to the rear to disengage gearshaft (21) from universal joint. Remove actuator
housing.
8
If pin assemblies (20) were removed with actuator housing (15), remove pin assemblies from actuator hous-
ing. Otherwise remove pin assemblies from mount.
9
If necessary, remove grommet (22).
b. Inspection
Inspect follower assembly (8). Replace if cracked or distorted.
c. Installation
Adhesives can burn easily, can give off harmful vapors, and are harmful to skin and clothing. To
avoid injury or death, keep away from open fire and use in well-ventilated area. If adhesive gets on
skin or clothing, wash immediately with soap and water.
1
If removed, install grommet (22) using adhesive.
2
Install actuator housing (15) and depress cannon assembly. Move actuator assembly forward to engage
gearshaft (21) to universal joint.
NOTE
Install the mounting cap screws loosely, then install pin assemblies and tighten mounting cap
screws.
3
With cannon assembly depressed, install three new lockwashers (19) three cap screws (18), and lower rear
pin assembly (20).
4
Elevate cannon assembly. Install new lockwasher (17) and front cap screw (16).
5
With cannon assembly still elevated, tap in upper front pin assembly (20) in actuator housing (15).
5-108 Change 2
Back to Top

