TB-9-3950-253-13-P
PALLETIZED LOAD SYSTEM TRUCK, M1075 and M1075A1 (PLS) AND HEAVY EXPANDED MOBILITY TACTICAL TRUCK, M1120, M1120A2, AND M1120A4 (HEMTT), ENHANCED CONTAINER HANDLING UNIT (E-CHU)
TECHNICAL BULLETIN; OPERATOR AND FIELD MAINTENANCE, INSTALLATION INSTRUCTIONS, AND REPAIR PARTS AND SPECIAL TOOLS LIST
JULY 2009
TB-9-3950-253-13-P - Page 572 of 704
TB 9-3950-253-13&P
Change 1
0052-62
0052
LIGHT BAR ASSEMBLY INSTALLATION – CONTINUED
NOTE
•
On trucks with standard lights, perform steps 22 through 26 for lights on right and left side
of slider beam.
•
On trucks with LED lights, perform steps 27 through 31 for lights on right and left side of
slider beam.
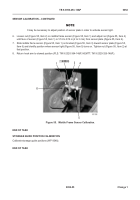
22. Install light bracket (Figure 64, Item 6), washer (Figure 64, Item 9), bolt (Figure 64, Item 10), washer
(Figure 64, Item 7), and nut (Figure 64, Item 8) on slider beam (Figure 64, Item 2).
23. Scrape or grind away paint surrounding mounting hole on underside of slider base (Figure 64, Item 11).
24. Install bolt (Figure 64, Item 16), washer (Figure 64, Item 15), ground wire (Figure 64, Item 14), washer
(Figure 64, Item 12), and locknut (Figure 64, Item 13) on slider base (Figure 64, Item 11).
25. Insert wire (Figure 64, Item 5) from vehicle wiring harness into solderless connector (Figure 64, Item 4) and
crimp securely.
26. Slide shrink wrap tube (Figure 64, Item 3) from extension wire (Figure 64, Item 1) over solderless connector
(Figure 64, Item 4) and apply heat until shrink wrap tightly encloses connector.
27. Install light bracket (Figure 64, Item 6), washer (Figure 64, Item 9), bolt (Figure 64, Item 10), washer
(Figure 64, Item 7), and nut (Figure 64, Item 8) on slider beam (Figure 64, Item 2).
28. Install bolt (Figure 64, Item 16), washer (Figure 64, Item 15), washer (Figure 64, Item 12), and locknut
(Figure 64, Item 12) on slider base (Figure 65, Item 11).
Figure 64.
Light Bracket Installation.
052
4
1
2
3
4
5
6
6
7,8 (HIDDEN)
2
9,10
11
12,13
14
15,16
(HIDDEN)
Back to Top


